Showing posts with label Manuf - Mark's Finest Papers'. Show all posts

Friday, March 30, 2012

What does Easter mean to you?


I love cute little bunnies, chicks and butterflies, everything that says "spring" and celebrates new life.  But I have to share with you that we never did the "Easter Bunny" thing with our kids.  Actually we never did any of the make believe icons like the tooth fairy or Santa Claus either.  However we did let your children know that other families did like to play these make believe games with their children and did teach them they should have respect and not spoil that for other children, if that's what their family chose to do.  We don't judge others for making that decision.  I think sometimes people are just raised a certain way and generation to generation pass down the traditions without even considering there may be another option. 

So today I'm sharing with you, not because I judge you or how you choose to raise your children, but becuase I want you to know there are other options.  When I have shared this with other's over the years, I know some of them didn't get that.  But I grew up in a home that did have Santa Claus, the Easter Bunny, and the tooth fairy.  And never once did my mother share with me the real reason these holidays are celebrated.  After I was saved, I actually regretted that she had not.  She grew up in a Christian home, so she knew.  And as an adult, I can't acutally remember a time when I really believed in any of them.  So was it really worth it??  My husband and I decided it was not.  We celebrated the holidays, but we chose to tell our children the real reason we did so.  We did fun acivities as well, so they had just as much fun as the other kids.  My children don't feel like they missed out on anything. 
Easter is a holiday that we celebrate because our Lord and Savior, Jesus died on the cross, that we might be saved, reconcilled with God, so that we can spend eternity with Him.  So as Easter approaches, I am so thankful for a holiday that reminds us that we have so much to be thankful for, but nothing greater than this.
Have a very blessed day!!
Melisa


***************************************************

Project Details

Stamps : discontinued set by Mark's Finest Papers,  but there are lots of floral options that would work.  Robyn's Fetish has a Lily digital stamp that would work great and is marked down HERE
 And here is a link to some of her other Easter digi's HERE.  The bible with the Lily is very pretty. 
Here is my card using that image


For the Lily's on the top card, I highlighted area's with a yellow Copic, I think Y11, and they added adhesive using by 2-Way glue pen and sprinkled with clear glitter.
Lace : Hobby Lobby
************************************************
Challenges
Cardabilities (sunday) - sketch (card #1)
Paper Sundaes (sunday) - spring flowers
Craft Your Passion (monday) - monochromatic
The Pink Elephant (monday) - butterflies (card #1)
You can check out my huge list of daily challenges by clicking on the "Challenges" tab at the top of my blog. Let me know if I have missed any!
Fan Badge
Grab yourself a badge for your  blog.
Add our banner to your blog

Thursday, March 29, 2012

Artist Trading Card / Mark's Finest Papers

Artist Trading Card 2 1/2" x 3 1/2"

I finally got my Feb / Mar issue of Stamper's Sampler in the mail and as soon as I seen the cover I new what my next Mark's Finest Papers project would be.  "Don't fence me in!" was a perfect sentiment for the "Chicken Scratch" stamp set.  This set was still in the store until recently, but now I don't see it.  Maybe because they just had a new release with the cutest chickens HERE.  And you can get the chicken wire in this set HERE
Thanks for stopping by!!
Melisa


***************************************************************

Project Details
I googled rosters to try and get an idea of how to color this little guy ... hey I'm a city girl, I've never seen a rooster in real life.  I used R27, Y11, E15, E09, and E33.
Trim watercolor paper 2 1/4" x 2 1/2".  Stamp chicken wire image with VersaMark and heat emboss with black embossing powder.  Color edges with yellow watercolor crayon (Lyra).  Carefully pull color to center so that it is lighter toward the center.  Ink edges with black ink and doodle around edges.  Adhere black lace (Hobby Lobby) across top and bottom of panel.  Adhere to pattern paper covered ATC (2 1/2" x 3 1/2").  Ink edges of ATC and doodle around edges.  Stamp rooster, color with markers (Copic), and trim.  Adhere.  Type words on computer, trim, ink edges, doodle around edges and adhere.  Embellish with plastic black sequin flowers (Queen and Co.  - really old from my stash).  Tye yellow thread into a know and pull through hole in center of flower before adhering.


You can view all of my ATC's HERE


Monday, March 19, 2012

Win a free stamp set !!!


Good Morning paper crafters!  Today I'm sharing a clean and simple card designed for Saturday's challenge over on the Mark's Finest Papers blog and today's challenge over at SpeedyTV.  The challenge at the MFP blog this week is to create a clean and simple card. Over at SpeedyTV we want to see you use a border punch.  I used "Spring Flowers" by Mark's Finest Papers.  I colored the image with watercolor paints. 

We would love to have you join our challenges over at SpeedyTV every monday.  And I'm excited to announce that they are giving away a
FREE STAMP SET each week now!! 
So please hop over and join us HERE.  Move your mouse over the "FSOTV CHALLENGE" button along the top of the page - do not click on it - and then select FSOTV Challenge #12.

MFP would also love for you to play along with their weekly challenges over on the blog as well HERE

Check out the latest new releases HERE.  I LOVE that bunny in the "Blessings" set!

Thanks for stopping by!
Melisa

********************************************************

Challenges
SpeedyTV - border punch
Mark's Finest Papers - clean and simple
Allsorts - 3 of something


Saturday, March 10, 2012

Artist Trading Card / Mark's Finest Papers

Artist Trading Card 2.5" x 3.5"

Ok, I have to admit, I'm not crazy about this one.  Not sure why.  I tried collaging different elements made by different companies.  The butterfly is by K&Company (from one of their emphemera packs) and the torn ticket across the bottom is really old by Daisy D.  The brown florals are a piece of patterned paper.   I really am in awe of people who do collage so well.  I do not claim to be one of them, teehee.    This one was designed using an image from "Black Eyed Susan's for Encouragement" by Mark's Finest Papers.  Mark's Finest Paper's host challenges every week on their company blog HERE and at StampTV every monday, HERE.  You can locate the challenges at StampTV if you check out the buttons along the top of the page.  Toggle the mouse over "FOSTV Challenges" to see the drop down menu of challenges.  I hope you will get a chance to join in sometime!

hugs,
Melisa

You can view all of my ATC's HERE

Friday, March 2, 2012

Copic Marker Chart


Hello!  Today I'm posting another card I created using an image from "Black Eyed Susans for Encoragement" by Mark's Finest Papers.

One of the things I've been working on recently is a "blending chart".   It's a resource I can take with me shopping to pick out matching patterned paper or cardstock.  My local scrapbook stores are 50 minutes away, so I'm also working on matching the Copic Colors up to cardstock I can purchase at Micheals or Hobby Lobby.  They are only 10 minutes away.  So from now on, I'm going to try and list the cardstock, when applicable, color and where I bought it.


I designed the chart using Microsoft Excel.  If you have Excel and would like a copy of a blank chart, email me at luv_2_stamp@yahoo.com, and I will send you a copy.

Have a blessed day!
Melisa

*************************************************

Project Details
Stamp Sets : Mark's Finest Papers
Copics : R22, R24, R27, G21, G24, YG17, Y11, E23
Cardstock : Bazzill Basics Berrylicious from Michaels
Deckled Scissors & Border Punch : Fiskars
Patterned Paper : Clover Dot - BoBunny

Wednesday, February 29, 2012

Watercolor Tutorial #2


Good Morning.  Today I'm sharing a watercolor tutorial with you using "Nature's Postage" by Mark's Finest Papers.  This set was discontinued but the technique could certainly be used for some of their other beautiful floral sets.

Let me start with some general information that I had posted previously with my other watercolor tutorial last year.  You can check out the entire post and step by step photo's HERE.

"I used Lyra Watercolor Crayons (12 set), Ranger Distress Ink - Tumbled Glass, and Derwent Watercolor Pencil #51 Olive Green. I got my watercolor crayons a few years back at a local craft store with a 40% off at a Joann's. I'm don't know who carries them these days, but what I have noticed online is that they have 24 set now. I had so much fun doing these that I'm considering finding a good deal on the larger set.
In general I brush on water to the area I'm going to be adding color, before adding the color.   Wetting the paper first helps the color flow. So I want continue to mention that, but make sure you do it. The crayon color are very concentrated, so a little goes a long way. You can always add more. I leave the crayons sitting in the tray they come in, wet my brush and then pick up a little color by brushing over the crayon. Keep a paper towel or napkin handy so you can remove unwanted color.. Just re-wet the area if needed, and blot if off with a paper towel. A couple of times I ventured outside the lines and was able to clean it up a little blotting the color off. Each crayon has a ID # on it. I used green (67), yellow (07), orange (13), and brown (99). Let's get started. "
The colors are the same for this tutorial except I didn't use the green.


After completing this one, I decided that it is better to do your lighter colors first.  Then it doesn't matter so much if you get out of the lines.  So in retrospect, I would have done the butterfly before the flower. 

Sky : Brush water on the sky area. Apply a little Tumbled Glass Distress ink to a plastic surface or acylic block. Wet brush and begin picking up the blue and painting your sky. The distress ink is not as concentrated. I tried to make it a little darker around the edges / corner.


Flower : Brush water over petals. Wet brush and pick up orange #13. I start out light, adding color from the center of the flower outward keeping some area's darker as shown above.  Then I went back a second time and add more concentrated orange to create shadows.


To create move depth, I added some brown mostly next to the flower center, but a little on the area's that have "lines" for shadows. I think you can see the difference in the previous photo and this one and tell where I added it.   I didn't worry about trying to blended it, because I knew I was going over it again with orange.


Add more orange to get the look you want. I also added a small amount of yellow along the very tips of the petals and brushed it inward toward the flower center, bleding it with the orange. That really highlighted some area's and made it pop.


I used brown and a little yellow in the flower center.

I used yellow on the butterfly wings, keeping the color bolder toward the butterfly body.  I added a little brown, very lightly (watered down) in most area's, especially along the outside edges of the wings.

Lastly I added a little orange inside the spots on the wings.


Hope you enjoyed this tutorial and are encouraged to get those watercolor crayons or pencils out!
hugs,
Melisa

You can view more of my Watercolor Tutorials HERE.

Thursday, February 23, 2012

Artist Trading Card / Mark's Finest Papers

2.5" x 3.5" Artist Trading Card

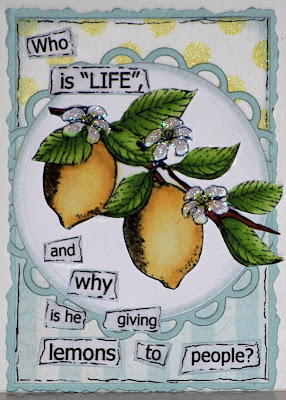
I'm back today using "Pucker Up".  This time I created an ATC.  I also used one of my new stencils by Crafter's Workshop "Mini Swiss Stamps".  I sprayed some "Daffodil" Glimmer Mist over it onto water color paper.   This is a FUN set!
I hope you haven't had any lemons thrown your way this week!
Melisa

*************************************************

Project Details
Stamps : Mark's Finest Papers "Pucker Up"
Spellbinders : "Standard Circles", and "Lacey Circles"


You can view all of my ATC's HERE


Monday, February 20, 2012

Purple Pansies


Hello friends.  I hope you are all doing well.  Today I am sharing a card with using an image you can find in the following Mark's Finest Papers stamp sets, "Spring Flowers", "Today, Tomorrow, and Always", and "Nature's Pansies".  These flowers immediately made me think of my grandmother who used to grow African Violets.  Probably because I couldn't remember the difference between a pansy and an African Violet, ha.  I don't remember a lot about her.  Isn't it amazing how images and music can wake up a memory that has been long forgotten. 
Hope all is well for you!!
Melisa

********************************************************

Project Details

Stamps : Mark's Finest Papers
Copic Markers : V000, V01, V12, V15, G21, G24, YG67, Y00
Embossing Folder : Musical Flourish by Cuttlebug
Lace : Hobby Lobby


Thursday, February 9, 2012

Mark's Finest Paper's Pucker UP


Today I'm sharing another card I designed using "Pucker Up" by Mark's Finest Papers.  Isn't this a cute sentiment.  I used Glimmer Mist - Lemongrass with a Crafter's Workshop stencil (Mini Swiss Dots) to create the polka dot background.  Then I soaked up the excess with the crepe paper.  I used water color paper and sprayed one area solid yellow to use for the lemons.  Then I added a darker shade of yellow with a water color crayon to add some depth.


The lemons on the inside were cut from a copy of my master board.
Hope your having a crafty week!
Melisa

*****************************************************
Project Details
Pattered Paper is from one of my My Mind's Eyes 6 x 6 paper pads
Glitter Mist Lemongrass
Glitter Glue over flowers
Ribbon - unknown
pearls - Hobby Lobby

****************************************************

Challenges

Mark's Finest Papers - spray mist
Papertake Weekly - Anything Goes
ABC - 2 of something (2 lemons)

Wednesday, February 8, 2012

Creating a Masterboard


Today I'm sharing a card that utilizes a copy of a Master Board.  I discovered the concept of "creating a Master Board" in one of the Stampington and Company publications, Take Ten.  Basically you create your own patterned paper, scan it, and then print sheets out to use in your artwork.  For this Master Board I used this lemon image from "Pucker Up" by Mark's Finest Papers.  Honestly  as much as I like this background, there is no way I would ever sit down and individually create / color it.  It would take forever.  But now that I"ve scanned it, I can print out my own lemon patterned paper anytime I want!

Check out a tutorial HERE
I hope you are inspired to create your own Master Board to use as background patterned paper as well!
Thanks for stopping by!
Melisa

**********************************************************

Project Details
Stamps : "Pucker Up" Mark's Finest Papers
Embossing Folder : Swiss Dots Cuttlebug
Border Punch : EK Success
Clear glitter glue on flowers
Copic Markers:
Yellows - Y0000, Y11, Y26
Greens -  G20, YG03, YG17
Brown : E57
Grey : N0 (flower petal shadow)
********************************************************
Challenges
Sketch - CPS


Stamp, Scrap, and Doodle - Die cuts or punches

Wednesday, January 11, 2012

Fun Fold Card


Hello everyone.  I hope you have all had a great week so far.  We had another beautiful day wit 71 degree weather, so I got out and pulled some weeds.  No fun there, but I had fun after I finished.  I created this fun / fancy fold card.  It was created for this week's challenge over at SpeedyTV.  We would love to have you join us.   I used "Big Boy Toys" by Mark's Finest Papers.  It's a really cute set with another truck and cute sentiments like "keep on truckin" and "Boys never grow up ... their toys just get bigger and more expensive! ".


I started with a 4.25" x 11" piece of cardstock.  I scored at 3.5" from the top and then again at 2.5" from the bottom.  The rest is obvious.  The buttons are paper.  I didn't have real ones.  Real ones would have been sturdier.  I only glued them on one side so that I could wrap the twine around them.  I left a really long piece after tying the knot in the middle of the top button, and then used that to wrap it up.

I was trying to go for a masculine look.  So I didn't want to do bows, or flowers.  It was hard to come up with embellishments that are masculine.  I guess less is more in this circumstance.

Before I let you go tonight I want to make sure you know about the Layers of Colors HUGE SALE! 
50% OFF !!  and free stamps as well ....  read all about in HERE.

Thanks for stopping by and please stop by and see us over at SpeedyTV!
hug, Melisa

You can view all of my Fun Fold Cards HERE
You can view more of my Masculine / Father's Day cards HERE.

You can view more of my Mark's Finest Papers projects HERE.
***********************************************************

Project Details
Stamps : Mark's Finest Papers "Big Boy Toys"
Cream Cardstock : Papertrey Ink
Blue Cardstock : Bazzill
Ink : Tsukineko VersaMagic "Night Sky"
Border Punch : Fiskars
Embossing Folder :  Cuttlebug "Swiss Dots"
Button Die : Memory Box "Scalloped Buttons"  ( I purchased mine from Frantic Stamper)
Twine : Papertrey Ink

Monday, January 2, 2012

Gate-fold Card Tutorial


Hello stampers.  I'm back today with a gate-fold card designed for Speedy TV's Challenge #1.   I hope you will join us. I used Trip to Lancaster by Mark's Finest Paper.  

Check out the step-by-step tutorial photo's below.


I over-lapped the images slightly.  I had to cut down along the horses back so that the fence would fit where the images over-lap.


If you are inspired to create a similar gate fold card link me to it. I would love to see what you come up with!
Have a great night!
hugs,
Melisa

 
You can view all of my Fun Fold Cards HERE


*********************************************************************

Project Details

Stamps : "Trip to Lancaster" by Mark's Finest Papers
Patterned Paper : My Mind's Eye Blush "Sweet" Eiffel Paper
Gem swirls : Prima


Begin with a 4 1/2" x 11" sheet of cardstock.  Find the center at 5 1/2" and add light pencil marks 2 1/4" to each side of the center point.   Don't draw the pencil lines all the way down.  I did it to show you where you were going to score.  Score.


Fold both sides / gates in.  They will overlap one another.  Measure over 2 1/4" from the fold lines on both sides as shown on panel A.  Draw a very light pencil line from top to bottom at this point.  This will serve as a guideline for cutting later.


Cut patterned paper panel slightly smaller than 2 1/4" x 4 1/2" x 2, ink edges,  and adhere to card front as shown on B.


Stamp images on both sides as shown above and below.


The goal was to position them so that the horse's head over laps the fence slightly.  Let me give you some measurements and you can put a light pencil line to guide your stamping :  The lowest point of the carriage image should a little more than 1/4" ( 5/16" to be exact)  from the bottom edge of the panel.  The lowest part of the fence line should be 1" from the bottom edge of the panel. 


Cut along the light pencil line til you reach the image.  Trim around images, then resume cutting along the pencil line again.   When you go to shut it, the fence line needs to lay behind the horse's head.  But to make it fit, you will have to cut in and down the back every so slightly.

Ink edges of card.  Adhere back of card to black cardstock.  Trim around the edges using deckled scissors.  Embellish with gem swirls.


Saturday, December 31, 2011

Happy New Year!


I hope you all have a safe and happy new year!!!
hugs, Melisa

Stamps : Mark's Finest Papers "Peaceful Nuthatch"
Punch : Martha Stewart
Patterned Paper : The Robin's Nest "Glitter Winter Snowflake"
Die : Spellbinders Die "Label Two" with the Grand Calibur

I loved this winter background I found at a local scrapbook stores so I started searching for the manufacturer since I had never heard of them. Looks like they have scrapbook kits, but also sale items individually as well.  Here is their home page if you want to check them out as well.

You can view more of my projects that I have used Spellbinders Dies on HERE.
You can view more of my Mark's Finest Papers projects HERE.
You can view more of my Winter projects HERE.

Tuesday, December 27, 2011

Shabby Chic Winter card


Hello Papercrafters!  I hope you all enjoyed your Christmas.  We had a wonderful Christmas.  Tried some new recipes.  Any time we cook ...  there are always mistakes and lots of laughs.  My tree's are still up.  I haven't recovered enough to tackle the chore of taking down all the decorations yet.  I"m trying to get back into a routine of crafting and blogging.  I actually have lots of projects I made before the holiday, but just have to write the post.  Today I"m sharing a card designed using "Peaceful Nuthatch" by Mark's Finest Papers.  The challenge this week over at Speedy TV is winter or blue.  We hope you will join us.  You can check out all the Speedy TV challenges on the MAIN PAGE.  Then go to the FOSTV Challenges button and select the challenge from the drop down menu.


Thanks for stopping by!
hugs, Melisa

You can view more of my projects that I have used Spellbinders Dies on HERE.
You can view more of my Mark's Finest Papers projects HERE.
You can view more of my projects using Bird images HERE.
You can view all of my Shabby Chic projects HERE.
You can view more of my Winter projects HERE.
You can view more of my projects that list the Copic colors listed HERE.

***************************************************

Project Details

Patterned Paper : Webster's Pages Your Life. Beautiful. from 2009
Copic Markers : Pinecones (E43, E29), Pine Needles (E81, YG95), Bird (C1, C3, E31, E33)
Chalk : Pebbles Inc.
Snowflake Punches : Martha Stewert
Distress Ink :  Vintage Photo
Glaze : Fresco Cream Golden
Deckled Scissors : Fiskars
Die : Spellbinders "Standard Circles" with the Grand Calibur

I do want to share that I made my white paper doily cream using the Fresco Cream Glaze by Golden.  You might be able to get the same effect by watering down some cream acrylic paint.  Then I grunged it up with the Vintage Photo Distress Ink.  I dapped it on here and there and used my finger to smear it around.


Monday, December 5, 2011

Let's swap Christmas cards!


Hello Paper Crafters!  I'm back today with a birthday card I think would be nice for a guy.  Designed using "A Trip to Lancaster" by Mark's Finest Papers.  I designed it for this week's challenge over at SpeedyTV to use Silhouettes.  Hop on over and join us this week.  You can find all of the challenges on the main page HERE.  Just toggle the mouse over "Friends of SpeedyTV" button in the upper left corner.  You should get a drop down menu and then select the challenge your interested in.  Let me know if you play along, I don't want to miss your entry!

So I'm off to the post office today to send out my first round of Christmas cards.  I would love to swap Christmas cards with you.  Just email me your address to luv_2_stamp@yahoo.com
have a great week!
Melisa

*********************************************************

Project Details

Stamps : A Trip to Lancaster by Mark's Finest Papers
Patterned Paper : My Mind's Eye 6 x 6 paper pad "Portabello Rd"
Cut-out - really old from my stash.  Daisy D
Corner die : Sizzix Architectural Accent #4
Ribbon : Offray
Lace : Hobby Lobby

Wednesday, November 30, 2011

Little Birs with Big Mouths


Here is another one using the set I talked about on monday.  I found this really cool patterened paper sheet by Bo-Bunny that was 12x12 but divided into all these smaller scenes or cut outs.  I knew this one was just perfect for a bird house.

Thanks for stopping by!
More Christmas projects coming tomorrow!
hugs, Melisa
********************************************
Project Details
Stamps : Mark's Finest Papers "Little Birds With Big Mouths"
Patterned Paper : Melissa Frances (brown), Bo-Bunny Gabrielle Cut Outs
Ink : Pearlescent Brown Tsukineko
Ribbon :  Offray
Watercolor Paints

Trim brown cardstock 4 x 6 and adhere to card front. Trim patterned paper (Melissa Frances) slightly smaller than card front. Ink edges (Tsukineko Pearlescent Brown) and adhere to card front. Trim patterned cut-out (Bo-Bunny “Gabrielle Cut Outs”) and wrap ribbon around bottom / tie bow (Offray), and adhere to card front. Stamp image (Mark’s Finest Papers “Little Birds With Big Mouths”)on watercolor paper (Canson 90lb) with water-proof ink (Palette Noir). Color with watercolor pencils, trim, and adhere to card front.

Friday, November 25, 2011

Cards with bird images using Spellbinders Dies

Hello!  I hope all of you enjoyed your Thanksgiving.  We had a wonderful day which wrapped up about 11:00pm with me as the Queen of Canasta!  Yep ...  I took the boys down.  teehee.  And over the weekend I spent saturday with my friend Deb.  She loves mixed media as well, so we worked on our She Art.  I'm going to get brave enough to share my canvas's one day.  Not familiar with She Art ??  It's simple art with a girl on it and some words that are meaningful to you.  I took She Art #1 from Christy Tomlison back in the spring.  If you are interested in mixed media, I recommend the class and you can check it out HERE.  I ended up starting a Christmas themed canvas.  Almost done, just need to add a few more details.  I also picked up some wooden birdhouses at Micheals, hoping to have time to alter them in a Christmas theme. 

Today I'm sharing a couple of cards I created using stamp sets by Mark's Finest Papers.  The one above uses an image from a set called Little Birds with Big Mouths.  MFP is going through some changes right now, under new ownership, and honestly, I'm not sure which of the old sets they will be adding back on, or which ones are discontinued.  But, I had already designed my Nov cards back in Oct, so I'm going to share anyway.


This set was in the store last week, but not there now.  It's called Chicken Scratch.  I designed this one using a clean and simple Take Ten sketch for a submission.  I'm also using today for the sketch challenge over at StampTV.  You can check out this weeks Freinds of SpeedyTV challenge HERE.  I hope you will join us!

Have a great week!
hugs,
Melisa

You can view more of my projects that I have used Spellbinders Dies on HERE.
You can view more of my Mark's Finest Papers projects HERE.
You can view more of my projects using Bird images HERE.

************************************************************
Project Details

Card #1
Stamps : Mark's Finest Papers - "Little Birds With Big Mouths"
Patterned Paper : K&Company, My Mind's Eye
Decorative Scissors : Scalloped Fiskars
Water Colors and Copic markers (flowers and leaves)
Ink : Distress Inks - Old Paper, Tsukineko Pearlescent Chocolate,  Palette Prusian Blue

Card #2
Stamps : Chicken Scratch Mark's Finest Papers
Spellbinders : Lacey Squares with my Grand Calibur
Copic Markers

Saturday, November 19, 2011

Teacup Card


Hello Paper Crafters.  I hope you are having a beautiful Saturday.  Is everyone ready to prepare their Thanksgiving feast??  I usually wait til the last minute to run to the grocery store and get everything I need.  I still have to dig out my recipes and see what ingredients I need to purchase.  I'm sad that I will not be spending it with my daughter this year .... but happy my son will be here.  Unfortunately, I can never get him or my husband to join me in the sing-a-long.  I love to start playing my Christmas music on Thanksgiving day while cooking.  Get's me in the mood for putting up the Christmas decorations. 

Since it's just the 3 of us, I know we will have lots of left over turkey.  Any idea's / recipes for how to repurpose it??  I do have one recipe a co-worker passed out from Women's Day.  It's "turkey and potato hand pies".  I may just give it a try.
 Today's card was created using the cutest teacup set!  "Floral Tea" .  I think pearls and lace are the perfect embellishements for a card like this.  I have to say, I'm out of the pearl strand and you would think it would be easy to find at one of the local craft stores.  All I can find are the larger pearls.  Hopefully someone will get some in eventually.  The lace is from Hobby Lobby.  I love getting my lace from Hobby Lobby.  I don't have to pay shipping and it's easy to get when I run out.  And of course it's even better when I get it on sale!

Just want to give you a quick reminder about the Challenges over at SpeedyTV!  Every Monday a new challenge is posted.  To find them ...  hop over to the home page HERE.  Then toggle over the Friends of Speedy button at the top.  The drop down menu list all the challenges.

I got some new MFP stamps and will be sharing some projects with you for some of the upcoming challenges.  I have to say it truely will be challenge for me, because they are all "scenery" sets.  I don't know if you have ever noticed, but I have never done "scenes".  Who knows what I will come up with!  All of MFP's new releases are next Mon-Wed.  The Design Team will be sharing lots of inspiration with you during their 3-Day blog hop!  Check out the MFP blog HERE.

I look forward to receiving the flood of emails with address for those Christmas cards!
hugs,
Melisa
You can view all of my Tea / Teacup related projects HERE

Monday, November 7, 2011

November Events - Mark your calendars!


Hello Paper Crafters.  It's been a while and it's good to be back.  Let me begin by asking for you prayers for a local student of mine who had to be rushed for emergency open heart surgery over the weekend. Her name is Pat.  Thanks so much for your prayers.

I had a wonderful vacation visiting with family for the past week in GA.  But it's time to get back in the swing of things.  So I'm spending the day catching up on laundry, grocery shopping, trying to figure out what I need to create next, and uploading photo's to gallery's.  I'm happy to report the cat survived while we were gone.  We had a neighbor come over and give him fresh water while we were gone.  My bird feeders were empty though, so the first thing I did was give them fresh water and refill my feeders.  Shortly after doing so my Cardnal showed up.  Week before last I had a pair of Grackles.  It was fun to see a new species come around.  But they didn't seen too interested in the bird feeders, and I haven't seen them since.

It's finally cooling down here in TX and it looks like the high for the next couple of days is 78-79.  So I thought it would be fitting to post a fall card.  I used "Autumn Fun" by Mark's Finest Papers.  I have to tell you shortly after we left to go out of town I received an email announcing that Mark's Finest Papers was under new ownership.  I was so surprised.  I would link you to the set, but it's not up in the store at this time.  The new ownership pulled down almost all the stamp sets and looks like they are finally adding some back on now.  So honestly, I'm not sure if this one is going to make the cut or not.  But the word is that they are going to be adding tons of new images, and it looks like it has already started.

Mark's Finest Papers has a HUGE Pre-Inventory sale going on right now as well.  In addition to the advertised sale (25% off select items, no coupon needed) on their home page, you can save more (additional 15% off everything, including sale items using HEIN15 promo code).  You want find the promo code on the home page, it was for email subscribers.  A good reason to sign up for their email newsletters, because you never know what other sales them may have coming up as they fade out old images, making room for new ones.


********************************************

UPCOMING EVENTS
Nov. 10th
Creative Cuts and More Gingerbread House Mini-Album Blog Hop
I'm so excited about this one.  And I can't wait to show you what I have created.  You can check out a video pre-viewing this mini-album HERE.  Make sure and join us for some fun idea's!


Nov. 14th - 16th
Spellbinders New Release's and there will be 2 designed by our very own Laura and Nina!  You are going to love them!  You will be able to purchase these along with many other Spellbinder's dies at the Layer's of Color Boutique


Nov. 16th

Did you love some of Nina's designs in the new TAC catalog, but never had time to order them???  Well here's a second chance!  Make sure you join us and find out which images she is releasing through Layer's of Color!!


Nov 21st

I have designed a free template that will be shared during this hop!  Wish I could tell you what it is, teehee!


Dec 1st
Gifts Galore Blog Hop by Layers of Color
A free template will be given out at this blog hop as well!

Well that wraps up all the info I have for today.
I hope you have a crafty week!
hugs, Melisa

Related Posts Plugin for WordPress, Blogger...