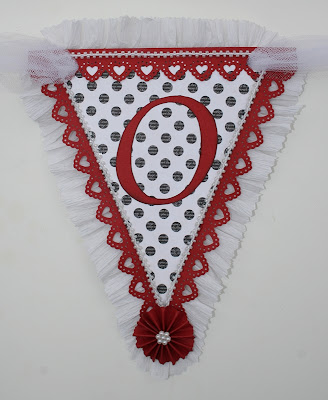
Hello stamper's!! Today I'm excited to share this little Christmas Banner. I LOVE Pink Persimmon's "Big Banner with Rosettes" set and have used it in the past to create a Fall Banner and Baby Shower Banner as well. Each flag measures 3 1/8" across x 3 5/8" top to bottom. As soon as I seen the images in the Antiquated Collection "Winter Girl" by Lisa M. Pace ... I this set would be the perfect embellishments for a banner!
Long post today .... but
if you have never altered chipboard letters ... then make sure you don't miss the tips near the bottom of the post.
I posted a tutorial on how to create these textured leaves for this banner HERE.
You can find more inspiration using this set on Lisa's blog and the Pink Persimmon Blog.
I used patterned paper from a 6 x 6 Christmas themed paper pad and chipboard letters I pick up at Hobby Lobby. And that yummy lace in the background is from either Hobby Lobby, or Joann's. Sorry I'm blanking out on the supplies today. I'm almost certain it's from Hobby Lobby though.
Tips for altering the chipboard letters :
2 options for staring out for the first step ...
1. Place letter on back of patterned paper, trace around edges with a pencil, trim around pencil lines and adhere to letter.
2. Adhere chipboard letter to back of paper, after dry, trim around edges of chipboard letter with an exacto knife.
Either way is fine. But the most important step to finishes off the edges so nicely is to file any excess paper using a Basic Grey Precision File tool. I think you can get these at Hobby Lobby. Notice they have different shapes. One is great for flat edges and others for tight corners. Then just ink the edges with an eye shadow applicator and ink.
If you like mini banners then this set is a must have!!!
hugs, Melisa
You can check out all my Pink Persimmon Projects HERE.
and Check out all my Christmas Projects HERE.


