Showing posts with label Project - Cards. Show all posts

Monday, November 18, 2013

Hero Arts "Just Saying"


Today I'm sharing cards created using "Just Saying" by Hero Arts.  I combined it with "Dear Lizzy 5th and Frolic" patterned paper I picked up at Joann's.  I love the little clipboard images I was able to trim from the patterned paper.


Have a great week!!
Melisa

Friday, November 15, 2013

Artistic Outpost "Picture Star"


Hello stampers!  Today I am sharing a card designed using Artistic Outpost "Picture Star".  Lots of cute images in this 5.5" x 8" stamp set.  I paper pieced the baby and colored all the blue using my Dove Blender Pen.  LOVE these pens.  They are perfect when you have stamped images in a particular color then want to color something in with the same color.  No having to match your ink up with a marker.  The Dove Blender Pen turns your ink pad into a marker!!  On this card I stamped the stars in blue ink then used the same pad and a Dove Blender Pen to color the babies hat, collar, belt, and shoes.  

I just noticed they are on sale right now HERE.  I have 1 pen for each major color.  If you decide to give them a try then don't forget to get the refill as well HERE.  

This set comes in mounted with cling (23.00) ... and unmounted (14.00).  So make sure you select the option you want from the drop down box. 


Hope you have a fabulous weekend!
Melisa


*************************************************************************

You Outta Be in Pictures – 4.25” x 5.5”
Stamps : Artistic Outpost “Picture Star “ stamp set
Patterned Paper : Stampin’ Up, My Mind’s Eye
Ink : Stampin’ Up – “Night of Navy” and “Ruby Red”
Dove Blender Pen

Trim patterned paper 4.25” x 5.5” and adhere to card front. 
Stamp images on card front.  Trim, tear and adhere patterned
 paper along top and bottom of card front.  Stamp large blue
stars, trim and adhere to card front.  Stamp baby on white card
stock and on patterned paper.  Trim and paper piece.  Color
with blue ink and Dove Blender Pen.  Adhere to card front.


Tuesday, November 5, 2013

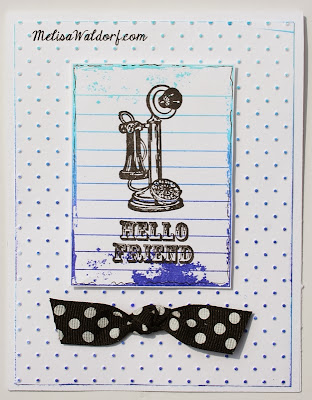
Gina K. Designs "Vintage Chic" + Rainbow Ink Pad = AWESOME


A while back I shared a fall card I created using Tsukineko - Kaleidacolor "Cappuccino Delight" rainbow ink pad.  You can check it our HERE if you like.  Today I'm sharing cards using the Tsukineko - Kaleidacolor "Berry Blaze".  These pads are really fun and add a different and great look to your cards.  I think you can get them at Hobby Lobby.  I've had mine many years and the ink is still great.


I combined the ink pad with Gina K. Designs "Vintage Chic" and "Vintage Notes" images.  These cards are really quick and simple to put together,  


For each card :
Trim white card stock panel slightly smaller than card front and emboss with "Swiss Dots" embossing folder (Cuttlebug).  Gently rub ink over the panel to color the dots.  Adhere to card front.  Stamp Vintage Notes with the rainbow pad then stamp the other images in black.  Trim and adhere to card front.  Easy peasy!

Make sure and check out the cool colors these ink pads come in HERE!

Hope you are finding some time to get crafty this week!!
Hugs, Melisa

You can check out all my Gina K. Design projects HERE.

Friday, October 11, 2013

Red Rubber Designs "Paint Splatters"


Hello friends.  This morning I want to share a couple of cards designed using my Red Rubber Designs stamps.  LOVE this stamp company.  Especially the vintage images.  But before I loose you with this lengthy post I want you to notice those paint splatters!!  LOVE this set.  Now you can have that mixed media paint splattered look easily.  Check out this set HERE.

 The owner, Pam is so sweet and delivery is super fast.  She usually ships same or 1 day after I order.  

In the past the stamps were just rubber and you had to purchase Cling Mount and mount them yourself ... which is not problem for me.  I use an electric hot knife and it's easy peasy.  Not sure what I'm talking about??  Email me and I'll share more.

But now she also sells already cling mounted stamps!!!  She frequently has sales so sign up for a newsletter so you don't miss a thing.


My FAVORITE section of the store is the MIXED MEDIA and VINTAGE sections of stamps.  The stamps I used on these cards can be found in those sections.

On card #1 I used :
and one of my favorites now ...
"Paint Splatters" (background)
LOVE this set!!

On card #2 I used :
"Fly Fairy" (girl)
"Background Soup" (polka dots)
"Be Fabulous" (the frame the fairy is in)
"Paint Splatters" (background)


Have a fabulous weekend friends!
hugs, Melisa


You can check out all my Red Rubber Designs Projects HERE.

********************************************

Project Details

Art Gave Her Wings – 4.25” x 5.5”

Stamps : Red Rubber Designs “ Art Gave Her Wings”  and “Splattered” stamp sets
Patterned Paper : My Mind’s Eye
Card stock : Stampin’ Up “Pear Pizzazz”
Ink : Stampin’ Up “Calypso Coral”, Tsukineko VersaMagic “Thatched Straw”
Dove Blender Pen      Dove Blender Pen Refill    
Embossing Folder : Cuttlebug “Swiss Dots”

Trim green cardstock 4.25” x 5.5”. Trim cream cardstock 3 3/8” x 5 1/8”
and emboss.  Trim cream card stock 3 3/8” x 4 ¼” and stamp splattered images / Art sentiment with Calypso Coral ink.  Trim patterned paper
strip.  Stamp sentiment on cream card stock and trim down to a banner.  Stamp girl on cream cardstock, color with ink / Dove Blender Pen and trim.  Layer / adhere all pieces to card front. Doodle around edges.

She Wanted to Go – 4.25” x 5.5”
Stamps : Red Rubber Designs “Fly Fairy”, “Splattered”, “Vintage Backgrounds”, “Be Fabulous” and “Background Soup” stamp sets
Card stock : Stampin’ Up “Pear Pizzazz”
Ink : Stampin’ Up “Calypso Coral” and “Pear Pizzazz”,
Tsukineko VersaMagic “Thatched Straw”
Dove Blender Pen

Trim green card stock 4.25’ x 5.5”.  Trim cream cardstock
 3 3/8” x 5 1/8” and stamp splattered images with Pear Pizzazz ink. 
Trim cream cardstock 1” x 5.5” and stamp polka dot image
(Background Soup” with Calypso Coral ink.  Stamp script image
(Vintage Backgrounds) on cream cardstock with Pear Pizzazz ink then stamp square outline (Be Fabulous) with black ink over it.  Trim. 
Stamp fairy on cream cardstock, color with ink / Dove Blender Pen,
and trim.  Stamp sentiment and trim to a banner shape.  Layer / adhere
all pieces to card front.  Doodle around edges.

Tuesday, October 8, 2013

StampTV sketch challenge blog hop

Hello stampers.  Tonight I am excited to be playing along with the StampTV Center Stage Alumni team.  If you arrived from Miesje Flach blog then you have landed on the next blog in the loop.  If you are just checking in at my blog first .... then head on over to Vicki's blog to start the hop.

Carolina Buchting (Gina K. Designs DT ) has put together a wonderful blog hop and one blessed blog hopper will WIN a free grab bag of Gina K Designs products!!  Leave comments along the way on each blog for a chance to win.  There will be an announcement of the winner over at StampTV on Tuesday Oct 15th.


For this CSS Blog Hop we were challenged to create a card with the sketch below.  We would love for you to play along as well HERE .

My card was designed using Melanie's "Stately Flowers 1 ".  So many gorgeous images in her Stately Flowers series.  I decided to play with my water color crayons for this one.  I took a few close-ups and will share them at the end of the post.


You're next stop is ...


**********************************************************

Project Details


I started out by creating a soft water color background.  I used NeoColor Watercolor II Crayons.  I also own Lyra as well.  I like the Lyra better (I think they are creamier), but only had a 6 color set, so I decided to give the Neocolor II a try for more color options.  Of course since them I found that you can get more colors with the Lyra as well.   I used some inexpensive water color paper from Target.  It for children.  The reason I liked it was because of the flat surface.  It was smoother and easier to stamp on than some of the water color paper I have used in the past.

I brushed some water over the entire panel ... then picked up some blue pigment  from one of my water color crayons and tried to randomly apply it.  I wanted a  mottled / soft look.  I heat dried the panel.

If you take a look at this particular set HERE comes with 2 different sizes of a California Posie.  I wanted to use both so I had to do some masking.  

When ever you are working with 2 images and layering them you need to mask the image in the forground before stamping the image in the background.  I use Eclipse Masking Tape.  In the photo above I had stamped the smaller image / foreground image, stamped it again on the masking tape, trimmed out the image, and then covered the image stamped on the panel.  It has a pink hue to it in the photo.  Then I stamp the larger / back ground image over it.


This is the result.  I played around with the first 2 petals and then decided I would try to shoot a few step by step photo's in case anyone was interested.

I started out dipping my brush in water and then loading it with yellow pigment from my water color crayon.  I don't "rub" the paint on because the paper is cheap and it will break down, but the other reason is because I have that blue in the background and it could mix with the yellow to make green.  I definitely didn't want green on my petals.  I just patted it on.  I wanted the color uneven so I let the paint flow where ever it wanted.


Next I switched to orange and patted it on.   While it was still wet, I reloaded with some yellow and patted from the outside edge of the petal in to try and blend and get rid of that harsh line you see with the orange.  


Sometimes it's a little hard to control the paint, so if I needed to, I added a little more orange to try and add depth / shadowing.  Water is your eraser.  So if you go out of the line a little, sometimes you can rub a little water over it and pick it up with a paper towel.  

Hope you enjoy the hop and are inspired to try using some watercolor crayons!
hugs, Melisa

You can check out all my Gina K. Designs Projects  HERE.

Wednesday, September 11, 2013

Gina K. Designs "Fall Foliage"


Hello friends.  I know "fall is in the air" for some of you ... sadly not here in Texas.  We are still in the mid 90's every day so far for September.  I am so ready for fall.  So I've started putting up all my fall decor.  I've started a fall banner for the mantel.  I have all the flags done ... just need to add some leaves between the banners.  Hopefully will be able to share that soon.

In the meantime you can check out a fall banner I made last year with a cool tutorial on how to make some textured leaves HERE.

Some of the ladies from the Stamp TV Center Stage Alumni are having a blog hop and here is the inspiration photo :


So I'm sure you will be able to find more fall inspiration based on this photo.
You can check it out HERE.

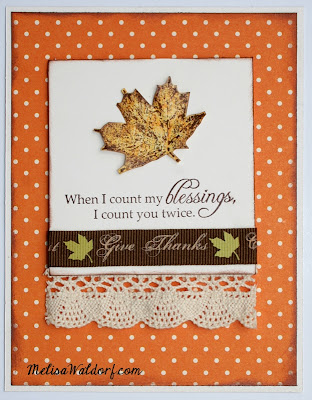
For today I want to share some cards I created using Gina K. Designs "Fall Foliage".  I will be adding some of these to my banner as well.  I wanted to play around and see what different looks I could get.  On the card above and on the last one, I stamped the image in brown ink over patterned paper.  I used my favorite brown ink Tsukineko - Brilliance "Pearlescent Chocolate".  


But for this one I used my a rainbow ink pad.  This particular one is by Tsukineko - Kaleidacolor "Cappuccino Delight".  Gorgeous fall colors.  Tsukineko makes rainbow pads in lots of fun colors and you can check them out HERE.


On the card above I simply stamp over patterned paper again.  You could whip up fall cards very quickly with these beautiful images!


Have a blessed day!
Melisa

You can check out all my Gina K. Designs projects HERE.
You can check out all my FALL projects HERE.


Monday, July 15, 2013

Gina K. Designs - "Retro Boutique" and WINNERS from last weeks give-away!


Good morning my crafty friends.  Quick post today to share a couple of cards designed using "Retro Boutique" by Gina K. Designs and the winners of last weeks give-away.  

Yesterday was a long day.  We finally made it to Wichita KS about 9 pm last night.  Today we are headed to Denver!  We will spend tomorrow moving our daughter into her apartment and then hopefully get to do some site seeing.  We have never been this far north before (We are GA, FL, TX people), so it will be fun to explore a different area of the country.

If any of you are familiar with Denver and have any recommendations for site seeing / eating out we would love to know!


I know we only had 12 commenters to draw from, but I still drew 2 names!  I used Random.org and the winners, after excluding blog hop participates are Maxine and Shelly!!  I know it says 1-100 on the photo's below, but I did use 1-12.  For some reason when I copied and pasted them, it changed to 100.

Ladies please email me your address's at luv_2_stamp.com and I will get your prizes to you as soon as we get back from vacation. 


True Random Number Generator  7Powered by RAN
True Random Number Generator  9Powered by RAN


Thank you so much for following my blog and taking the time to comment!
hugs, Melisa


You can check out all of my Gina K. Designs Projects HERE.

****************************************************************

Project Details

Card #1
Stamps : Gina K Designs
Patterned Paper : Authentique 6 x 6 paper pad
Copic Markers Y13, R32, W4, C8

Cover card front with patterned paper.  Trim white card stock 2 5/8" x 5 1/2", stamp image and sentiment.  Color image and adhere to card front.  Adhere lace.

Card #2
Stamp set : Gina K Designs
Patterned Paper : Authentique 6 x 6 paper pad
Copic Markers : Y13, R32, C8
Deckled Scissors : Fiskars
pop dots

Cover card front with patterned paper.  Trim white cardstock 2 1/2" x 5 1/2", adhere to black cardstock, and trim edges with deckled scissors.  Adhere   and trim.  Adhere to card front.


Saturday, June 8, 2013

Moxie Fab Trigger Tuesday Challenge


Hello friends.  Hope you are having a fabulous Saturday.  Today I am sharing a shabby chic styled card inspired by this weeks Moxie Fab Trigger Tuesday Challenge.


I was also inspired by a couple of other challenges posted this week.


I hope you get a chance to do some crafting this weekend as well!
hugs, Melisa

You can check out all of my Gina K. Designs Projects HERE.

*********************************************

Stamps : Gina K. Designs "Dogwood and Butterfly" and Studio G (faux washi tape image)
Patterned Paper : Sweetly Smitten (6 x 6 paper pad ) by Sassafrass Lass
Die : Cheery Lynn Designs (doily)
Embossing folders : Cuttlebug - Swiss Dots, The Paper Studio - Quarterfoil
Lace trim - Joann's Fabrics
Ink : Momento "Angel Pink"
Copic Markers : Y0000, Y00, Y11


Wednesday, April 24, 2013

Gina K. Designs "Close-knit Friends" and "Retro Boutique"


Hello friends!  I'm doing 2 post for today.  I'm trying to get back into crafting and blogging on a regular basis now that my mom is doing better.  Right now I'm working on some magazine calls and then I will switch back to blogging more.  So many idea's, so little hours in the day!  The first post was so personal, that I wanted to split them up because I have more cards to share with you.  I love this set!!!  Isn't the sentiment so clever???   I paper pieced the image for this one.  I liked the color combination of the kraft, black and orange so much that I decided to see what else I could create using them. 

Do any of you have a cutting machine??  Which one do you think is better????


I paper pieced the dress on this one.  I used my black oil pastel around the circles to make them pop.

What do you think about this color combo??  I hope you are inspired to give it a try and as always ... if you are, let me know so I can check out your project!

Hope your day is filled with sunshine and joy!
hugs,
Melisa

You can check out all of my Gina K. Designs Projects HERE.

********************************************************

Project Details

Card #1
Stamps : Gina K. Designs  “Close-Knit Friends”
Patterned Paper : My Mind’s Eye
Cream and Kraft Cardstock : Papertrey Ink
Markers : Copic YR68, YR07, E31, E55
Ink : Momento “Tangelo”

Stitch cream panel to kraft panel and adhere to card front.  Trim
strip of patterned paper with deckled scissors, scrunch and
zig-zag stitch.  Adhere to card front.  Stamp yarn / basking on
cream and kraft cardstock.  Color, trim and paper piece yarn / basket.  Adhere to card front.  Stamp sentiment.  Embellish with buttons.


Card #2
Stamps : Gina K. Designs “”Retro Boutique”
Patterned paper : My Mind’s Eye
Cream and Kraft Cardstock : Papertrey Ink
Circle Punches : EK Success and Paper Shapers
Oil Pastels : Crayola

Trim kraft panel, stitch around edges, and ink edges.  Punch circles
from patterned paper, ink and doodle around edges, and lay out on
kraft cardstock panel.  Lightly trace around edges of circles with pencil
and then set circles to the side.  Apply black oil pastel around penciled
outlines and rub / blend with fingers.  Adhere patterned paper circles
to card front.  Adhere kraft panel to cream card front.  Stamp dress on
kraft cardstock and patterned paper.  Color belt / trim black, trim, and
then paper piece dress.  Adhere to card front.  Stamp sentiment.

Saturday, February 23, 2013

A couple of Gina K. Design cards


Hello friends.  I'm so glad it's Saturday.  We are hoping to fit a bike ride in later today with our daughter.  It's beautiful in Texas right now.  We are having our spring with high's in the 70's most days.  I spent some time organizing photo's this week, since I'm trying to get back into it on a regular basis.  The problem is that I love so many of the scrapbook products I see .... but so many of my photo's from years ago were in color .... and don't match.  Apparently orange and blue were colors my son looked great in!  I think I have to get over that feeling that everything has to match and just go for it.  I need grandchildren and more black and white photo's teehee.

I used to store my photo's in these plastic "Sterilite" drawers because it seemed like an easy way to thumb through them.  They were pretty much organized by year ... but a lot were not.  Sometimes I would pull multiple photo's out trying to match them up ... and then never file them back.  So there was a catch all drawer.  So I have filed 20 years of photo's in photo albums the last couple of months.  WHEW!  I have given up on an notion that I will scrapbook them all.  And who would want to sit down and look at that many scrapbook albums anyway.  I'm excited that I have them out of drawers and in albums where my family can flip through them and look at them.

I do have a couple of cards to share today I designed using some Gina K. Designs images.  I used "Retro Boutique"  on this one.  Isn't that dress so cute.  I wanted it to be something you would want to pull out of the closet for a special event.  I loved popping up the dress to make it 3-D.  It's hard to see, but I added a little black party streamer to create a ruffle along the bottom.  I also added some beaded trim (Hobby Lobby).  The patterned paper is from Hobby Lobby.  


I used "Garden Fresh" for this card.  I thought the plaid ruffle trim and raffia gave it a cute farm fresh feel.  This set comes with more cute fruit / veggies and phrases.

I hope you have a fun and fabulous weekend!
hugs, Melisa

You can check out all of my Gina K. Designs Projects HERE.

Sunday, February 17, 2013

The Craft's Meow Birthday Card


Hello friends.  Today I'm sharing a card designed using "Fly Free" by The Craft's Meow.  
Hope you are all having a fabulous Sunday afternoon!

hugs, Melisa

**************************************************

PROJECT DETAILS

Patterned Paper Prima "London Market" 6 x 6 paper pad
Deckled Scissors : Fiskars
Punch : Martha Stewart (butterfly)
Die : Spellbinders Fancy Tags Two
Seam binding : Hug Snug
Rose : Wild Orchids

******************************************

CHALLENGES

Anything Goes : Vintage Shabby
Alphabet Challenges : Anything with wings (butterfly)
Crafty Catz : BINGO 
I have pearls (center of butterfly, die and punch, ribbon)

A Gem of a Challenge : punches or die


Thursday, February 7, 2013

3 ways to use paint on your backgrounds ...


Hello friends!  I'm so excited to share these today.  I have several different idea's for ways you can use acrylic paint on your projects.  I have used them on cards, but they could be used for scrapbooking, artist trading cards, and art journals / mixed media as well.  

All of the projects today feature Hero Arts stamp images as well.

On the card above I used Hero Arts "Design Block : Flourish" and "3 Artistic Butterflies".  I watered down some acrylic paint just a little (mine was very thick) and patted it on the background stamp with a foam brush.  I spritz the water color paper lightly with water and then stamped the background.  I think it would be fun to try multiple color paints as well.  Next I splattered on some watered down pink paint using a small round paint brush.  


For the second card I spritz the water color paper lightly with water and then "stamped circles" on the background with the cardboard centers from toilet paper and paper towels.  Again the paint was watered down a little.  Then I spritz again with water so that the paint would run and the background would become mottled.  I did some smaller pieces for ATC's using some small plastic lids from my chapstick and an hand sanitizer bottle.  The green paint was splattered on.  The stamp for this card is "Classic Bloom".


The background on this one was stamped like the first one using "Cling Dots".  I used "Dictionary Greetings" and "Cupcakes" as well.

I also created by own washi tape for all of these cards as well.  You may remember I did this last year on some of my Pink Persimmon Artist Trading Cards.  Adhere masking tape to wax paper (so you can pull it back up later and adhere it to your project).  Paint masking tape then stamp with patterned images.

A few general tips ...
Watercolor paper paper comes in different weights and textures.  Doesn't matter what kind you use, but keep in mind that the thinner the paper, the more it will warp.  Mine was thinner that I usually use.  After the panels were dry I ironed them to flatten them by placing the panels between 2 paper towels.

Acrylic paints vary in viscosity as well.  Just practice til you get the feel for how much to water yours down.

I hope you are inspired to use acrylic paint on your projects.
Have a fabulous day!
Melisa


Related Posts Plugin for WordPress, Blogger...