Showing posts with label Published Projects. Show all posts

Monday, July 15, 2013

Gina K. Designs - "Retro Boutique" and WINNERS from last weeks give-away!


Good morning my crafty friends.  Quick post today to share a couple of cards designed using "Retro Boutique" by Gina K. Designs and the winners of last weeks give-away.  

Yesterday was a long day.  We finally made it to Wichita KS about 9 pm last night.  Today we are headed to Denver!  We will spend tomorrow moving our daughter into her apartment and then hopefully get to do some site seeing.  We have never been this far north before (We are GA, FL, TX people), so it will be fun to explore a different area of the country.

If any of you are familiar with Denver and have any recommendations for site seeing / eating out we would love to know!


I know we only had 12 commenters to draw from, but I still drew 2 names!  I used Random.org and the winners, after excluding blog hop participates are Maxine and Shelly!!  I know it says 1-100 on the photo's below, but I did use 1-12.  For some reason when I copied and pasted them, it changed to 100.

Ladies please email me your address's at luv_2_stamp.com and I will get your prizes to you as soon as we get back from vacation. 


True Random Number Generator  7Powered by RAN
True Random Number Generator  9Powered by RAN


Thank you so much for following my blog and taking the time to comment!
hugs, Melisa


You can check out all of my Gina K. Designs Projects HERE.

****************************************************************

Project Details

Card #1
Stamps : Gina K Designs
Patterned Paper : Authentique 6 x 6 paper pad
Copic Markers Y13, R32, W4, C8

Cover card front with patterned paper.  Trim white card stock 2 5/8" x 5 1/2", stamp image and sentiment.  Color image and adhere to card front.  Adhere lace.

Card #2
Stamp set : Gina K Designs
Patterned Paper : Authentique 6 x 6 paper pad
Copic Markers : Y13, R32, C8
Deckled Scissors : Fiskars
pop dots

Cover card front with patterned paper.  Trim white cardstock 2 1/2" x 5 1/2", adhere to black cardstock, and trim edges with deckled scissors.  Adhere   and trim.  Adhere to card front.


Wednesday, April 24, 2013

Gina K. Designs "Close-knit Friends" and "Retro Boutique"


Hello friends!  I'm doing 2 post for today.  I'm trying to get back into crafting and blogging on a regular basis now that my mom is doing better.  Right now I'm working on some magazine calls and then I will switch back to blogging more.  So many idea's, so little hours in the day!  The first post was so personal, that I wanted to split them up because I have more cards to share with you.  I love this set!!!  Isn't the sentiment so clever???   I paper pieced the image for this one.  I liked the color combination of the kraft, black and orange so much that I decided to see what else I could create using them. 

Do any of you have a cutting machine??  Which one do you think is better????


I paper pieced the dress on this one.  I used my black oil pastel around the circles to make them pop.

What do you think about this color combo??  I hope you are inspired to give it a try and as always ... if you are, let me know so I can check out your project!

Hope your day is filled with sunshine and joy!
hugs,
Melisa

You can check out all of my Gina K. Designs Projects HERE.

********************************************************

Project Details

Card #1
Stamps : Gina K. Designs  “Close-Knit Friends”
Patterned Paper : My Mind’s Eye
Cream and Kraft Cardstock : Papertrey Ink
Markers : Copic YR68, YR07, E31, E55
Ink : Momento “Tangelo”

Stitch cream panel to kraft panel and adhere to card front.  Trim
strip of patterned paper with deckled scissors, scrunch and
zig-zag stitch.  Adhere to card front.  Stamp yarn / basking on
cream and kraft cardstock.  Color, trim and paper piece yarn / basket.  Adhere to card front.  Stamp sentiment.  Embellish with buttons.


Card #2
Stamps : Gina K. Designs “”Retro Boutique”
Patterned paper : My Mind’s Eye
Cream and Kraft Cardstock : Papertrey Ink
Circle Punches : EK Success and Paper Shapers
Oil Pastels : Crayola

Trim kraft panel, stitch around edges, and ink edges.  Punch circles
from patterned paper, ink and doodle around edges, and lay out on
kraft cardstock panel.  Lightly trace around edges of circles with pencil
and then set circles to the side.  Apply black oil pastel around penciled
outlines and rub / blend with fingers.  Adhere patterned paper circles
to card front.  Adhere kraft panel to cream card front.  Stamp dress on
kraft cardstock and patterned paper.  Color belt / trim black, trim, and
then paper piece dress.  Adhere to card front.  Stamp sentiment.

Wednesday, October 10, 2012

Gina K. Designs "The Magic of Christmas"


Good Morning!  Today I'm sharing a couple of projects designed using "The Magic of Christmas" stamp set by Gina K. Designs.


The Gift bag and box are by Creative Cuts and More.


It's never too early to get started on Christmas projects!

Have a great day!
Melisa

You can check out all of my Gina K. Designs Projects HERE.

***********************************************


Project Details

Gift box and gift bag : Creative Cuts and More
Ribbon : May Arts Silk Ribbon
Gems : Hero Arts
Tag: hand cut
Stamps: “The Magic of Christmas” GinaK Designs
Ink: Momento Tuxedo Black, VersaFine Crimson Red
Markers: Copic R29, R59
Tools : Deckled Scissors Fiskars

Christmas Gift Box :
1) Fold and adhere Creative Cuts and More (pre-cut and pre-scored) Square Box #10.
2) Wrap with ribbon and tie bow at top.
3) Hand cut tag using deckled scissors along the bottom of tag.
4) Stamp “joy”.  Create mask with Eclipse Masking Tape.  Stamp ornaments.
5) Color with Copic markers.  Ink edges.  Adhere to front of box.

Christmas Gift Bag :
1)      Stamp sled, snowflakes, and sentiment on front of Creative Cuts and More (pre-cut and pre-scored) Large Square Bag.
2)      Color sled with Copic markers.
3)      Embellish snowflakes with red jewels.
4)      Fold and adhere bag.
5)      Tie red bow around handles.

Card :

Stamps : GinaK “The Magic of Christmas”
Markers : Copic

Patterned Paper : The Girl’s Paperie
Glitter Glue : Stickles

Adhere front of card to back of a larger piece of red cardstock and then trim around the edges with deckled scissors. Trim cream cardstock and patterned paper and adhere to card front. Stamp ornaments on patterned paper and on white cardstock. Color, trim and adhere ornaments to card front. Stamp sleigh and snowflakes on a 2 ½” x 3 ¼” piece of cream cardstock. Adhere panel to red cardstock and trim around edges with deckled scissors. Adhere to card front. Stamp sentiment on a ¾” x 2 ½” piece of cream cardstock and adhere to red cardstock. Trim around edges with deckled scissors and adhere to card front. Add glitter glue to center of snowflakes and red dots on patterned paper.


Thursday, October 4, 2012

Gina K. Designs - "Springtime Silhouettes"


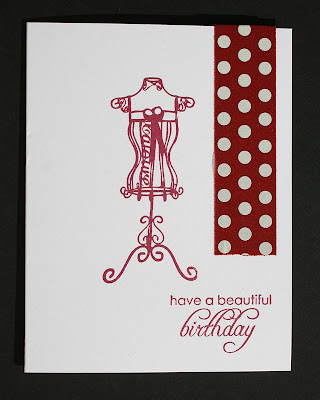
Today I'm sharing a set of clean and simple cards using GinaK Designs "Springtime Silhouettes".


Combined with some fabric tape these were very easy to put together.


And would a quick and easy set like this make a great gift set??
Thanks for stopping by!
Melisa

You can check out all of my Gina K. Designs Projects HERE.

********************************************

Project Details


Stamps : Gina K “Springtime Silhouettes”
Fabric tape : 7 Gypsies
Ink : Colorbox Fluid Chalk Maroon

Stamp image and sentiment. Embellish with fabric tape.


Friday, August 31, 2012

GinaK Designs "Springtime Silhouettes"


And here is my 3rd card for today ...  designed using GinaK Designs "Springtime Silhouettes".  I am really enjoying this set because it has so many little images and cute sentiments in it.

Well that's it for tonight!!  I'm off to bed.

You can check out all of my Gina K. Designs Projects HERE.

Thursday, August 23, 2012

Gina K. Designs - "Stars" with gesso


For this ensemble, I decided to focus on CAS and gesso.  The stamp set is "Stars" by GinaK Designs.  Isn't that star border die so cute!!  It's by Sweet n' Sassy.  It comes as a combo with a heart one as well.  


The large star is from a stencil.


thanks for stopping by!
Melisa

You can check out all of my Gina K. Designs Projects HERE.

*********************************************

Project Details

Card #1
Rock Star - 4 1/4" x 5 1/2"
All Stamps : Gina K. Designs "Stars"
Kraft Paper : Papertrey Ink
Patterned Paper : Cosmo Cricket 6 x 6 paper pad
Ink : Tsukineko Brilliance Red Rocket
Gesso
Star Stencil : Art Minds by Michaels

Dry brush on gesso where you want to stamp sentiment.  Trace large star on patterned paper with a stencil, trim, and adhere to card front.   Stamp stars, trim, and adhere to card front.  Stamp sentiment.

Card #1

Card #2

God's Promises - 4 1/4" x 5 1/2"
All Stamps : Gina K. Designs "Stars"
Kraft Paper : Papertrey Ink
Ink : Tsukineko Brilliance Red Rocket
Gesso
Star / Scallop die : Sweet n' Sassy

Dry brush on gesso where you want to stamp sentiment.  Cut star / scallop borderwith die and adhere to card front.  Stamp stars, trim, and adhere to card front.  Stamp sentiment.


Card #3
Good Friends - 4 1/4" x 5 1/2"
All Stamps : Gina K. Designs "Stars"
Kraft Paper : Papertrey Ink
Ink : Tsukineko Brilliance Red Rocket
Gesso
Star die : Sweet n' Sassy

Dry brush on gesso where you want to stamp sentiment.  Cut star / scallop border with die and adhere to card front.  Stamp stars, trim, and adhere to card front.  Stamp sentiment.


Thursday, April 19, 2012

GinaK Designs - Springtime Silhouettes

  
Today I'm sharing another Springtime Silhouettes card.  I am also using a fun flourish die from Cheery Lynn Designs.  I love that there are sooooo many companies making dies now.  So many choices and many of them to fit specific images as well.  Do you have any favories???  
Happy die cutting!!
Melisa

You can view all of my GinaK Designs projects HERE.

****************************************************

Project Details
Stamps : GinaK Designs "Springtime Silhouettes"
Ink : Tsukineko Brillance Pearlescent Chocolate
Die : Cheery Lynn Designs "Mega Fanciful Flourish"


Trim polka dot patterned paper ink edges and adhere to card front . Trim aqua patterned paper  and ink edges. Adhere cream cardstock on the back along top edge and trim with deckled scissors Adhere to card front. Adhere trim along bottom edge. Cut flourish and adhere to card front. Stamp image on cream cardstock and trim. Embellish with brown tuelle. Stamp sentiment on cream cardstock and cut with oval die 

Wednesday, April 4, 2012

GinaK Designs - "Springtime Silhouettes"


GinaK's Springtime Silhouettes has 9 different silhouette images in it.  So easy to stamp and no coloring necessary.   It also comes with 11 different sentiments that cover a wide range of themes.  So this one set, goes a long way.  Sentiments for friendship, birthday, encouragement, I'm sorry, and get well are just a few.  I have 2 more cards using this set in the works and can't wait to share more idea's for this one!

I kept this one clean and simple.  White space is hard for me, but I like how this one turned out.    I used up some really old ribbon and cardboard buttons from my stash.  That's always a good thing.  I used Spellbinders Labels Four.
I would like to invite you to join me tomorrow for the Sweet N Sassy blog hop.  Lots of chances to win free stamps!


Thanks for stopping by!
Melisa

You can view all of my GinaK Designs projects HERE.


Thursday, March 15, 2012

GinaK Designs "Springtime Silhouettes"


I have received several fun GinaK sets the last few months and just didn't have time to play with them. So that is my goal this month.  The cards I'm sharing today are designed using a set called "Springtime Silhouettes".  It's a fun set that includes images and sentiments for lots of occasions.  I love that the stamps are solid.  So you can whip up cards really quick.


Thanks for stopping by!!
Melisa

You can view all of my GinaK Designs projects HERE.

********************************************************

Project Details

Card #1
Stamps : GinaK Designs "Springtime Silhouettes"
Ink : Tsukineko Brilliance Pearlescent Chocolate
Die : Cheery Lynn Designs "Mega Fanciful Flourish"
Scissors : Fiskars Deckled

Adhere card to a larger piece of brown cardstock and trim around edgs with deckled scissors.  Trim patterned paper, ink edges, and adhere.  Cut 2 brown vines.  Cut 1 apart and use to add an extra swirl and leaves to the first one.  Stamp images with brown ink on cream cardstock, trim, and adhere.  Stamp sentiment.


Card #2
Stamps : GinaK Designs "Springtime Silhouettes"
Ink : Tsukineko Brilliance Pearlescent Chocolate and Pixie Dust
Stencil : Crafter's Workshop
Border Punch : Fiskars
Stick Pin : Making Memories
Embossing Folder Cuttlebug

Trim brown cardstock and adhere to card front.  Trim cream cardstock, emboss, ink edges, and adhere to card front.  Trim cream cardstock, emboss, ink edges, and adhere to card front.  Trim cream cardstock 3 1/4" x 4".  Apply pink ink over polka dot stencil, then ink edges with brown ink.  Tie a knot and wrap ends of brown ribbon around edges of panel.  Mat on pink cardstock.  Cut brown strip at least 3 1/2" wide and punch scalloped border on 1 end.  Adhere other panel and then trim 3 edges with deckled scissors.  Stamp sentiment with brown ink.  Stamp image with brown ink on cream cardstock, trim, and adhere.  Embellish with stick pin. 


Tuesday, September 27, 2011

GinaK Designs "So Grateful"


Here is a little fall inspiration for you today.  I know I said I was going to post a Christmas gift set, but I totally forgot that I had pushed that one forward for a "Gift's Galore" blog hop with Layers of Color in November.  Sorry.  Hope you like this one instead!  And I hope you are enjoying some fall like weather in your neck of the woods.  It was 97 here today!  Seriously.  Well, I do hate cold weather and while some of you were shopping for winter wear this weekend ....  I was laying out in the sun!

This is a REALLY cute fall set that I bought over a year ago called "So Grateful".   It comes with an apple card, pumpkins, and the cutest acorn border.  GinaK has another fall set I have as well.  It's called "Autumn Beauty".  So if you are still on the hunt for some fall images ..  hop over and check them out!

Have a great day!!
Hugs,
Melisa

You can check out all of my Gina K. Designs Projects HERE.

*************************************************

Project Details

Ink : Tsukineko Momento Tuxedo Black and
Brilliance Pearlescent Chocolate
Markers : Copic Chalk : Pebbles
Patterned Paper : The Paper Studio
Spellbinders Labels Two
Ribbon : Offray
Deckled Scissors : Fiskars

Trim brown cardstock 4 ¼” x 5 ½”. Trim patterned paper (The Paper Studio) 4” x 5 ¼”, ink edges with brown ink (Tsukineko Brilliance Pearlescent Chocolate) and adhere brown cardstock panel. Trim / emboss white cardstock using Nestibilites Labels Two (Spellbinders). Stamp image (GinaK So Grateful) on scrap white cardstock. Color with markers (Copic basket - E55, E57, pumpkins - E97, E35, gords -Y00, E33, leaves G61, G24, YG67, E33, E9, wheat - Y00, E33) and trim around all of the image except those little lines coming off the sides of the wheat. Stamp image again on the label. Do not color, this is to provide the lines coming off the sides of the wheat. Adhere colored image over this image. Stamp sentiment. Apply yellow and orange chalk (Pebbles Inc) around edges and image. Distress edges with brown ink and adhere to brown cardstock. Trim around label with deckled scissors (Fiskars). Tie brown ribbon around bottom part of panel (Offray). Adhere panel to front of card. Embellish with fall sprig (local craft store).


*************************************************

And here are a few other cards I made a long time ago using these sets.  And even though I'm not crazy about them, maybe you will be inspired by the images.  The photo's are old as well, I tried to fix them up a little.


Friday, May 20, 2011

Published in CardMaker!

It is always fun to open up a magazine and see your name!  I was blessed to have 3 projects published in the May issue of CardMaker magazine and this is just one of them.


You can read all the details in the May issue of CardMaker!

Thanks for stopping by!
Melisa

Wednesday, April 27, 2011

CardMaker Mag Publication Teacher Gift Set

Good Morning!  Today I am sharing a Teacher Gift set.  You can find a slightly altered version in the May issue of CardMaker Magazine and as one of the featured projects on the CardMaker Magazine site HERE.  The chipboard on this set was discontinued, so I had to make a few changes.  The "A+ Teacher" and "for my teacher" sentiments are FREE downloads you can get at the bottom of my sidebar.  The gift boxes are from Creative Cuts and More.


And here is a photo of the changes I made:


I substituted some digital images.  I used "Apple for Teacher" digi set by Fred She Said and "Back to School Desk" by The Stamping Boutique.


Thanks for stopping by!
Melisa

****************************************************

You can view more of my Back to School / Teacher Appreciation projects HERE.

You view more Gift Bags / Boxes HERE.

You can view more of my Creative Cuts and More projects
HERE.

Friday, January 14, 2011

Paper Craft Stamp It! Techniques

Paper Craft magazine is the bomb! 
I have loved and purchased there magazine for years, so imagine my excitement when they selected one of my cards for this issue. (insert giggling)  Not sure if I'll ever get in there again, so I had to share this one. 


I used Rise and Shine by Layers of Color!

I'll be back tomorrow with another sneak peek!
thanks for stopping by,
Melisa

Thursday, May 27, 2010

Published!! in Stamper's Sampler!

I have submitted sooooo many times, so I am really excited that FINALLY, I have my second publication!
Stamper's Sampler had a "Crazy for Chartreuse" challenge for their June/July issue and I'm thrilled to be a part of it!


To create these cards I used "3 Flying Girls" by Lost Coast Rubber Stamps.  If you like collage style stamps, you will love this company!  Check out their catalog HERE.  You can order online from the catalog.  You can find some "Alice in Wonderland" and some vintage style portraits, people in the NEW section.  And these "Chess Pieces" - people are really fun!


Thanks for stopping by and celebrating with me!

Saturday, March 27, 2010

GinaK Designs - "Lovely Shelf"


Good Morning.  Today I'm sharing with you a wonderful stamp set called "Lovely Shelf". (once you get to the link, scroll down to check this particular set out)  I designed this one using the colors assigned at the
Copic colors I chose:
purple - BV02, BV04, BV08
green - G20, YG03, YG91
brown - E55, E35

The sentiments are really versatile.  You can fill in "aunt", "mother", etc.  There are also other sentiments, "Thanks for a lovely gift", "What lovely news", etc.  You can get this one from GinaK Design.  The designer is Nina Brackett and I really love some of her sets.  You can check out all of her stamp sets, digital paper lines, and Perfect Patterns line HERE.
Nina's Blog


Prefer digital images???  Check out Nina's digital stamp line at Squigglefly
I created this one for this week's color challenge over at StampTV.


This one is not my usual card.  I'm thinking I would have liked it better if I had a white background with black polka dots.  No time to change it now. 

Stamps :  butterfly - The Angel Company "Wishing Happiness"
sentiment - GK Designs
Patterned Paper - 7 Gypsies


Thanks for stopping by!
Related Posts Plugin for WordPress, Blogger...