Good morning Paper Crafters and welcome to the new release blog hop of the Layers of Color Christmas Collection designed by Nina Brackett and Laura Kirste Campbell!
But if you have started at my blog, you will want to start at the
Layers of Color blog and then hop around so that you can make sure you are entered into the
Grand Prize Drawing! Laura will give you full instructions on how to qualify on her blog.
If you have arrived from Linda's blog, then you are in the right place and keep scrolling to read how you can win a free stamp from me!
I have created a Christmas Ornament using one of the decorative elements from
"Touch of Elegance" and the dove from one of the new release sets "
Glad Tidings". You can check out all the details on how to create this one at the very bottom of my post.
I actually have 2 more Christmas ornament post coming up in the future. You can subscribe to my blog post via email if you like, so you don't miss a thing. Just check out the side bar gadget. No worries, if you get sick of me, I promise I want be offended if you unsubscribe later.
One of the ornaments / tutorials will be posted on Wed. Oct 26th during the Layers of Color Christmas Ornament Blog Hop!
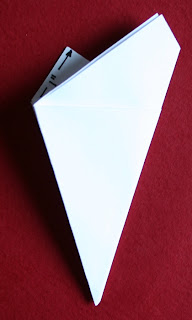
I also have a Five Star 3-D (4 folds / 1 cut ) ornament tutorial I posted recently and after the hop I would love to invite you back to check it out
HERE.
My Prize
Today I'm giving away "Holly Angel" cling art stamp (sample - meaning it's not packaged)! All you have to do is leave me a comment. You have until 12 noon EST to leave me a comment. I will do a random drawing and post a winner as soon as I get off work Tuesday (late afternoon). The winner will have til Wednesday 10am EST to contact me at
luv_2_stamp@yahoo.com to claim your prize.
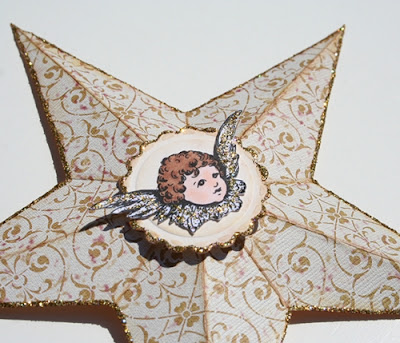
and here is a card I created using Holly Angel
The next stop in this hop is the very talented
Good luck in the drawings!
****************************************
Project Details Ornament
Cream Cardstock
Gold cord and beads
Stickles Champagne and Recollections Gold Glitter from Michaels
Tsukineko Glue Pad
2-Way Glue Pen
Krylon Matte Finish Clear Spray
Scor-pal
Aleene's Tachy Glue ($1.47 at Walmart. I LOVE this stuff, use it all the time, and store it upside down in an empty peanut butter jar to keep it ready to go all the time. The jar I use is actually plastic and it has a little dimple in the bottom)
I used a glue pad and gold glitter - not a great choice. I recommend VersaMark and gold embossing powder. I just didn't have an embossing powder that was gold or glittery enough to match my beads and I'm a little picky, teehee.
Cut 4 cream rectangles 2" x 2 5/5". Locate the centers on each side and put a pencil dot. Connect the dots with light pencil lines to create your diamond. Score from top point to bottom point down center. If you want that really glittery look, then you can do it like I did. But I"m not resposible for any hair loss you may have along the way as I promise, you may want to pull it out, teehee. But there is an easier way I'll share in a few minutes. Wipe the cream diamond with an
Embossing Magic or dryer sheet. Stamp the decorative image on the diamond with a
Glue Pad (Tsukineko), VersaMark may work, not sure. Sprinkle with glitter. It was a brilliant plan up until now! Ha! The glue pad doesn't completely hold the glitter and at this point it can be easily rubbed off. So very carefully use a very fine brush to pick up any unwanted glitter, hopefully there is not much if you used Embossing Magic or your dryer sheet. To fix the glitter in place spray it with a
clear matte finish spray (Krylon). But wait, one coat want do ... I think I ended up with 3, making sure to let it dry in between coats. I'm sorry there was just NO substitute embossing powder that gave me that glittery gold look I wanted. And it matched my Champagne Stickles perfectly. And for an easier method, just use VersaMagic and gold embossing powder. After your 4 diamonds are dry, fold along the score line. Adhere 2 at a time so that you now have 2 pairs. Use a white tacky glue for this. Measure and cut your gold cording. You want to leave it looped at the top as your hanger or so you can attach a metal hanger, and leave lots extra coming out the bottom. So tie off a loop at one end leaving the 2 tails hanging down. Add tacky glue down the inside center of one side and all over the back side. Glue the 2 side together. You should now have the 2 gold tails haning out the bottom. After it is dry, add beads. Make sure you buy beads with holes big enough to thread the 2 pieces of the gold cording. Tie a knot at the bottom of the beads to hold them in place. Leave a little tail to adhere your image to. Stamp the dove, trim, outline with
2-Way glue pen and sprinkle with gold glitter. After it is dry, adhere to tail you left hanging below the beads. When adhering actually hang the ornament, so you can get it adhered right where you want it. Adhere Stickles around the edges.
I should have taken photo's. The next ornament I post is similar and I will post step by step photo's with that one.
***************************************************
Project Details Holly Angel Card
Copic Markers
Pink cardstock
Vellum with white snow flakes - unknown
doily
Ribbon - Offray double sided white satin ribbon
Deckled Scissors - Fiskars
Adhere front of A2 card to a larger peice of white cardstock. Trim around edges with deckled scissors. Trim pink cardstock and patterned vellum slightly smaller, wrap with white ribbon, tie bow and adhere to card front. Adhere doily. Stamp angel and banner. Color with Copic Markers. Apply glue with 2-Way glue pen to wings, avoiding black lines as much as possible. Sprinkle with glittern. Use a tooth pick or paper poker to remove unwanted glitter over stamp lines. After dried, adhere angel and banner to card front.
Thanks for stopping by!
Melisa


