Showing posts with label Theme - Birthday. Show all posts

Saturday, June 8, 2013

Moxie Fab Trigger Tuesday Challenge


Hello friends.  Hope you are having a fabulous Saturday.  Today I am sharing a shabby chic styled card inspired by this weeks Moxie Fab Trigger Tuesday Challenge.


I was also inspired by a couple of other challenges posted this week.


I hope you get a chance to do some crafting this weekend as well!
hugs, Melisa

You can check out all of my Gina K. Designs Projects HERE.

*********************************************

Stamps : Gina K. Designs "Dogwood and Butterfly" and Studio G (faux washi tape image)
Patterned Paper : Sweetly Smitten (6 x 6 paper pad ) by Sassafrass Lass
Die : Cheery Lynn Designs (doily)
Embossing folders : Cuttlebug - Swiss Dots, The Paper Studio - Quarterfoil
Lace trim - Joann's Fabrics
Ink : Momento "Angel Pink"
Copic Markers : Y0000, Y00, Y11


Wednesday, April 24, 2013

Gina K. Designs "Close-knit Friends" and "Retro Boutique"


Hello friends!  I'm doing 2 post for today.  I'm trying to get back into crafting and blogging on a regular basis now that my mom is doing better.  Right now I'm working on some magazine calls and then I will switch back to blogging more.  So many idea's, so little hours in the day!  The first post was so personal, that I wanted to split them up because I have more cards to share with you.  I love this set!!!  Isn't the sentiment so clever???   I paper pieced the image for this one.  I liked the color combination of the kraft, black and orange so much that I decided to see what else I could create using them. 

Do any of you have a cutting machine??  Which one do you think is better????


I paper pieced the dress on this one.  I used my black oil pastel around the circles to make them pop.

What do you think about this color combo??  I hope you are inspired to give it a try and as always ... if you are, let me know so I can check out your project!

Hope your day is filled with sunshine and joy!
hugs,
Melisa

You can check out all of my Gina K. Designs Projects HERE.

********************************************************

Project Details

Card #1
Stamps : Gina K. Designs  “Close-Knit Friends”
Patterned Paper : My Mind’s Eye
Cream and Kraft Cardstock : Papertrey Ink
Markers : Copic YR68, YR07, E31, E55
Ink : Momento “Tangelo”

Stitch cream panel to kraft panel and adhere to card front.  Trim
strip of patterned paper with deckled scissors, scrunch and
zig-zag stitch.  Adhere to card front.  Stamp yarn / basking on
cream and kraft cardstock.  Color, trim and paper piece yarn / basket.  Adhere to card front.  Stamp sentiment.  Embellish with buttons.


Card #2
Stamps : Gina K. Designs “”Retro Boutique”
Patterned paper : My Mind’s Eye
Cream and Kraft Cardstock : Papertrey Ink
Circle Punches : EK Success and Paper Shapers
Oil Pastels : Crayola

Trim kraft panel, stitch around edges, and ink edges.  Punch circles
from patterned paper, ink and doodle around edges, and lay out on
kraft cardstock panel.  Lightly trace around edges of circles with pencil
and then set circles to the side.  Apply black oil pastel around penciled
outlines and rub / blend with fingers.  Adhere patterned paper circles
to card front.  Adhere kraft panel to cream card front.  Stamp dress on
kraft cardstock and patterned paper.  Color belt / trim black, trim, and
then paper piece dress.  Adhere to card front.  Stamp sentiment.

Saturday, February 23, 2013

A couple of Gina K. Design cards


Hello friends.  I'm so glad it's Saturday.  We are hoping to fit a bike ride in later today with our daughter.  It's beautiful in Texas right now.  We are having our spring with high's in the 70's most days.  I spent some time organizing photo's this week, since I'm trying to get back into it on a regular basis.  The problem is that I love so many of the scrapbook products I see .... but so many of my photo's from years ago were in color .... and don't match.  Apparently orange and blue were colors my son looked great in!  I think I have to get over that feeling that everything has to match and just go for it.  I need grandchildren and more black and white photo's teehee.

I used to store my photo's in these plastic "Sterilite" drawers because it seemed like an easy way to thumb through them.  They were pretty much organized by year ... but a lot were not.  Sometimes I would pull multiple photo's out trying to match them up ... and then never file them back.  So there was a catch all drawer.  So I have filed 20 years of photo's in photo albums the last couple of months.  WHEW!  I have given up on an notion that I will scrapbook them all.  And who would want to sit down and look at that many scrapbook albums anyway.  I'm excited that I have them out of drawers and in albums where my family can flip through them and look at them.

I do have a couple of cards to share today I designed using some Gina K. Designs images.  I used "Retro Boutique"  on this one.  Isn't that dress so cute.  I wanted it to be something you would want to pull out of the closet for a special event.  I loved popping up the dress to make it 3-D.  It's hard to see, but I added a little black party streamer to create a ruffle along the bottom.  I also added some beaded trim (Hobby Lobby).  The patterned paper is from Hobby Lobby.  


I used "Garden Fresh" for this card.  I thought the plaid ruffle trim and raffia gave it a cute farm fresh feel.  This set comes with more cute fruit / veggies and phrases.

I hope you have a fun and fabulous weekend!
hugs, Melisa

You can check out all of my Gina K. Designs Projects HERE.

Sunday, February 17, 2013

The Craft's Meow Birthday Card


Hello friends.  Today I'm sharing a card designed using "Fly Free" by The Craft's Meow.  
Hope you are all having a fabulous Sunday afternoon!

hugs, Melisa

**************************************************

PROJECT DETAILS

Patterned Paper Prima "London Market" 6 x 6 paper pad
Deckled Scissors : Fiskars
Punch : Martha Stewart (butterfly)
Die : Spellbinders Fancy Tags Two
Seam binding : Hug Snug
Rose : Wild Orchids

******************************************

CHALLENGES

Anything Goes : Vintage Shabby
Alphabet Challenges : Anything with wings (butterfly)
Crafty Catz : BINGO 
I have pearls (center of butterfly, die and punch, ribbon)

A Gem of a Challenge : punches or die


Monday, November 19, 2012

Vintage style birthday card


Hello paper crafters!  Today I want to share a vintage styled card I designed using images from 2 stamp sets from Pink Persimmon "Society Lady" and another recently released set "Postal Stamps".  "Society Lady"  is from the Antiquated line.  It includes a lot of vintage images.  I recently purchased some 8 x 8 mini-album pages and other accesories from the "Documented" line by Simple Stories.  Combined with the Antiquated line of images, I think I will be able to create a nice little album using some really old black and white photo's.  I don't have all the sets yet, but once I get them and it's all done, I will share.  I am completely addicted to Cheery Lynn Designs "French Doily".  I love the look I get when I cut from tissue paper and then spray it with inks.  

I'm off to work and then grocery shopping for the rest of my Thanksgiving meal ingredients!  I will be missing my daughter this year.  But I"m soooo thankful to have my son and his girlfriend.  I love the time we spend together cooking in the kitchen, listening to Christmas music,  and then decorating the tree's.  Did I mention I'm in love with his girlfriend.  She is so sweet .... and she likes to craft!  We spent the day together last wednesday and I really enjoyed it.  

Check out Pink Persimmon stamps HERE.

Thanks for stopping by today ....  and in case I don't get a chance to post again this week .... 
Happy Thanksgiving!!
hugs, Melisa

*********************************************************

Project Details

Stamps : Pink Persimmon "Society Lady" and "Parcel Post  "
Patterned Paper : My Mind's Eye 6 x 6 paper pad "Portabello Rd"
Die : "French Pastry Doily" Cheery Lynn Designs
Lace : Hobby Lobby
Decorative Scissors : Deckled by Fiskars


Tuesday, October 30, 2012

Crafty Secrets Born to Fly Birthday


Good morning stampers.  Today I'm sharing a card I created using "Born to Fly" by Crafty Secrets.  Isn't she a cutie patootie with the little the little bird nest on her head.  So many cute little elements in this set including the little tickets, flag, and butterflies.  And this set is on sale for 15.50 (reg 24.99).  


Crafty Secrets is transitioning into digital products so all their clear art stamps are on sale!  Check out what's left HERE.  They have lots of fun digital sets listed at their Etsy store HERE.  Their design team is creating some really cool inspiration using the new digital line.  

thanks for stopping by!
Melisa

*******************************************************

Project Details

Patterned Paper :  Authentique “Essentials Collection” 6 x 6 paper pad
Flower : The Paper Studio
Gathered tuelle and pom pom trim - Joann’s
Glitter Glue : Stickles
Markers : Copic

Trim patterned paper and adhere to card front.  Adhere trim and flower.  Stamp sentiment in bottom corner.  Stamp scalloped trim, fairy girl, wand, bird, small and large butterflies, and tickets.  Color with markers, trim and adhere to card front.  Stamp banner flags, color, trim and string to create banner.  Adhere to card front.  

*******************************************************

Challenges

Paperplay (thur) - butterflies or bee's
Sugar Creek Hollow (sat) - texting vintage style ( grey patterned paper is words)
Totally Gorjuss (sat) - thing with wings
By the Cute and Girly (monthly) - birthday 


Thursday, October 4, 2012

Gina K. Designs - "Springtime Silhouettes"


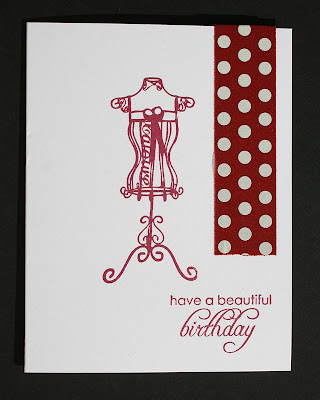
Today I'm sharing a set of clean and simple cards using GinaK Designs "Springtime Silhouettes".


Combined with some fabric tape these were very easy to put together.


And would a quick and easy set like this make a great gift set??
Thanks for stopping by!
Melisa

You can check out all of my Gina K. Designs Projects HERE.

********************************************

Project Details


Stamps : Gina K “Springtime Silhouettes”
Fabric tape : 7 Gypsies
Ink : Colorbox Fluid Chalk Maroon

Stamp image and sentiment. Embellish with fabric tape.


Wednesday, August 22, 2012

Pink Persimmon Ensemble!


Good morning card makers.  Today I'm sharing a Pink Persimmon ensemble that is easy to create because it's mostly solid stamping!  So you can whip these out in no time at all.  The part that takes the longest is that little tissue paper ruffle I added, but so worth it if you like that vintage look.  LOVE this tissue paper by  Pink Paislee!!  If you don't want to take the time to create a ruffle (it is a little messy because you get glue all over your fingers), then use a border punch.

Also note that all of the image panels are ATC size!

On the first card, I'm featuring "Scottie Dog".  This set comes with different options for his coat and collar as well as 4 different scottie dog images.  You can check out another card I created using this little guy HERE.   At the bottom of this post HERE.  And 2 ATC's using this little guy HERE.


This card features "Flower Garden".  You can check out another card using "Flower Garden" HERE.  The sentiment is from "Vintage Greetings"


Remember the ATC I posted on Thur??  Well here is what it looks like on a card !  I LOVE this "Small Banner Set".  It has several pattern options that you can choose from for the fla0066gs, or you can just go with a solid color and add some letters.  
You can view another card using "Singing Birds"  HERE.  I also created a couple of ATC's last year using "Singing Birds" HERE.
You can view a layout using "Small Banner"  HERE.

I'm linking this one up to Word Art Wednesday this week, not because I used the word art (you do not have  to), but because my little birdies are singing, almost appearing as if they are shouting joyfully.   If you get a minute, hop over and read about "The Meaning of Joy".

Check out Pink Persimmon stamps HERE.

Thanks so much for stopping by!
Melisa

*********************************************


Project Details 

Card #1
Happy Birthday - 4 ¼” x 4 ¼”
All Stamps : Pink Persimmon "Scottie Dog "  and the solid circle is from "Flower Garden"
Check out Pink Persimmon stamps HERE.
Patterned Paper : Basic Grey  6 x 6 “Basic’s White” paper pad
Tissue Paper : Pink Paislee
Ink :  Palette Orangerie, Chartreuse,  and Claret
Embossing Folder : Cuttlebug “Swiss Dots”

Emboss card front.  Trim cardstock 2 ½” x 3 ½”.  Trim patterned paper slightly smaller.  Stamp images.  Adhere panel to cardstock.  Ruffle tissue paper and adhere to back of panel with a line of Tacky White Glue (Aleene’s).  Adhere panel to card front with adhesive pop dots.


Card #2

Thank You - 4 ¼” x 4 ¼”
All Stamps : Pink Persimmon "Flower Garden"
Check out Pink Persimmon stamps HERE.
Patterned Paper : Basic Grey  6 x 6 “Basic’s White” paper pad
Tissue Paper : Pink Paislee
Copic Markers
Embossing Folder : Cuttlebug “Swiss Dots”

Emboss card front.  Trim cardstock 2 ½” x 3 ½”.  Trim patterned paper slightly smaller.  Stamp images.  Color images with markers.  Stamp sentiment.  Embellish with buttons.  Adhere panel to cardstock.  Ruffle tissue paper and adhere to back of panel with a line of Tacky White Glue (Aleene’s).  Adhere panel to card front with adhesive pop dots.

Card #3
Tweet Tweet - 4 ¼” x 4 ¼”
All Stamps : Pink Persimmon "Small Banner Set" and "Singing Birds"
Check out Pink Persimmon stamps HERE.
Patterned Paper : Basic Grey  6 x 6 “Basic’s White” paper pad
Tissue Paper : Pink Paislee
Ink :  Palette Orangerie, Chartreuse,  and Claret
Copic Markers
Embossing Folder : Cuttlebug “Swiss Dots”

Emboss card front.  Trim cardstock 2 ½” x 3 ½”.  Trim patterned paper slightly smaller.  Stamp banner images, trim, polk holes in corners, and string.  Layout banner and then stamp birds / sentiment.  Color birds and then adhere banner to panel.  Adhere panel to cardstock.  Ruffle tissue paper and adhere to back of panel with a line of Tacky White Glue (Aleene’s).  Adhere panel to card front with adhesive pop dots.

Tuesday, April 24, 2012

Seize the Cupcake by Hero Arts


Hello Stampers!  Today I'm sharing another card I created for the Hero Arts monthly challenge.  If you want to join my, the deadline is 4/26 and you can read all the details HERE.  There are 3 sketches to choose from and a couple of other catagories as well.  I used "Seize the Cupcake" stamp set for this one.  You have to have a Flickr account to play along. 

ha-april2012-sketches

thanks for stopping by!
hugs, Melisa


You can view all of my Hero Arts projects HERE.


*****************************************************

Projects Details
Stamps : Hero Arts
Patterned Paper : ColorBok (yellow), MME Sunshine (blue polka dots), MME Portobello Road (blue floral), MME Madison Ave (pink for scalloped circle)
Deckled Scissors
Spellbinders : Lacey Circles, classic circles
Ribbon MME

***************************************************

Challenges

Stampin' Sisters in Christ (sun) - soft pastels
Love to Create  (mon) - anything goes
Creative Card Crew (tues) - ribbon
Flourishes (tues) - ribbon, diecut, pink BINGO
Fussy and Fancy - dies and punches
Mark's Finest Papers (sat) - stitching


Monday, April 23, 2012

Sweet n' Sassy "Bee Happy Rhubarb"


Good Morning Stampers!  Today I am sharing another cutie patootie from Sweet 'n Sassy.  I also want to let you know about the beary awesome sale Sweet 'n Sassy has going on until Wed.  40% OFF!! everything!!  Check out the details HERESo if you have been thinking about picking up some Sweet 'n Sassy, now's the time to do it.  I got my order in on Sunday.  This one was designed using the sketch challenge over at the Sweet Stop Sketch Challenge Blog HERE.  A new challenge is posted every saturday.  But if digital images are more your style, then you can play along on the Sweet 'n Sassy Digi Challenge Blog HERE for a chance at winning some fabulous images!

I hope you have a beary nice week!
hugs, Melisa

You can view all of my Sweet n' Sassy projects HERE.

*********************************************************************

Project Details
Stamps : Sweet 'n Sassy "Bee Happy Rhubarb"
Patterned Paper : My Mind's Eye Lost and Found - Madison Ave.  6 x 6 paper pad (you can get this one at Hobby Lobby)
Copic Markers E23, E25, E59  RV11, R81,  E53 (ears, nose, bee-hive)
Glitter Glue : Stickles - Cotton Candy 
Spellbinders Lacey Circles die and 1 3/4" Paper Shapers Punch
Hand Cut scalloped border using a chipboard peice as a guideline

************************************************************************

Challenges


Corrosive (sun) - from a bottle (glitter glue)
Paper Sundaes (sun) - let's get cute
Stamptacular Sunday (sun) - loads of layers
The Crazy Challenge (mon) - girly
Paperplay (thur) - animals
Crafty Catz (fri) - stripes
Fussy and Fancy (fri) - Punches and dies
Secret Crafter (sat) - movie title "Winnie the Pooh"
By the Cute and Girly (monthly) - Winnie the Pooh

Friday, March 2, 2012

Copic Marker Chart


Hello!  Today I'm posting another card I created using an image from "Black Eyed Susans for Encoragement" by Mark's Finest Papers.

One of the things I've been working on recently is a "blending chart".   It's a resource I can take with me shopping to pick out matching patterned paper or cardstock.  My local scrapbook stores are 50 minutes away, so I'm also working on matching the Copic Colors up to cardstock I can purchase at Micheals or Hobby Lobby.  They are only 10 minutes away.  So from now on, I'm going to try and list the cardstock, when applicable, color and where I bought it.


I designed the chart using Microsoft Excel.  If you have Excel and would like a copy of a blank chart, email me at luv_2_stamp@yahoo.com, and I will send you a copy.

Have a blessed day!
Melisa

*************************************************

Project Details
Stamp Sets : Mark's Finest Papers
Copics : R22, R24, R27, G21, G24, YG17, Y11, E23
Cardstock : Bazzill Basics Berrylicious from Michaels
Deckled Scissors & Border Punch : Fiskars
Patterned Paper : Clover Dot - BoBunny

Thursday, September 22, 2011

Pink Persimmon Birthday Card using an Owl


Good Morning Paper Crafters.  I have a fun card to share with you today using "Wise Old Owl" by Pink Persimmon.  Isn't he seriously cute!  What's so much fun about this set is that all the parts of his body are separate.  So, you can stamp the body, head, and wings different colors.  I paper peiced the eyes.

One of the reason's that this old owl is so wise is because he wears so many hats!  teehee.  You can add a crown, a party hat, or a graduates cap.  So this set would be great for a birthday card, Father's Day card (with the crown and sentiment "dad you rule" or maybe "king for a day"), or graduation card. 

It also comes with a variety of sentiments :
"What a hoot"
"Whoo loves you?"
"Thank whoo?"
"Guess whoo's a wise old owl?"
and "See you later owl-igator!"

You can check out more inspiring projects by the PP design team over on the PP Blog HERE

I told you it was a cute set!
Have a great day!
Melisa

You can view more of my Masculine / Father's Day cards HERE.
You can view more of my Pink Persimmon projects HERE.
You can view more of my Owl projects HERE.
You can view more of my Birthday projects HERE.

*******************************************************

Project Details

Stamps : "Wise Old Owl" by Pink Persimmon
Patterned Paper : Teresa Collins "Celebrate" line (back side of "Stars" for the verbage paper)
Cut out 3 stars from one side and then use the verbage side for your background
Ink : Distress Ink Broken China, VersaFine Crimson Red
Border Punch : Fiskars
Deckled Scissors : Fiskars

I stamped the body first, then the wings, on white cardstock.  I had to practice a couple of times to get used to how to line the wings up with the body.  Then I added the head, paper peiced the eyes and hat.  You have to stamp the branch on the patterned paper first, then the owl body with branch on white cardstock, then trim the owl body and line it up over the branch you stamped on the patterned paper.

Wednesday, September 21, 2011

Pink Persimmon " Flower Garden"


Good Morning!  What a great day for me, because I'm off and will be trying to get caught up on some projects I need to finish.  : )    I've been sitting here at my computer, getting distracted by my cute little birds outside my window.  I am blessed to have almost floor to ceiling windows in my studio and I put 3 bird feeders right in front of the window.  I have a different type bird food in each one.  I think I am the favorite house on the block for the birds.  I get so many on and off all day long.  Unfortunately I don't know what type they are except for the red birds.   They bring a smile to my face. 

Today I'm sharing a Pink Persimmon card designed using Flower Greetings.  This is an example of how you can take one stamp and stamp it repeatedly to create your own little backgound.  What a fun set!

What have you been working on lately??
Have a great day!
Melisa

************************************************


Project Details
Stamps : Pink Persimmon “Flower Greetings
Patterned Paper : My Mind’s Eye Cardstock : Bazzill
Ribbon : Maya Road and Offray
Lace : Hobby Lobby
Trim cardstock and adhere to front of A2 card. Trim white cardstock slightly smaller, stamp across top and adhere to card front. Trim patterned paper strip and adhere across bottom. Embellish front of card with ribbon, lace and pearls. Stamp flower on pattered paper, white, and coral cardstock. Trim and paper piece. Adhere to card front.

Monday, September 5, 2011

Tempting Template


Good Morning Paper Crafters.  Today I am sharing a card designed using one of the Stamper's Sampler Tempting Templates.  In each issue, Stamper's Sampler challenges stampers to create a project using a template.  You can find a library of their templates HERE.  This particular issue was a pinwheel pattern.  I have mailed it in and I'm hoping to see it in a future issue.
You can check out my project using the umbrella template that was published in the August issue HERE.
I hope you find a template you like and have fun with it.  Let me know what you come up with!
Melisa

******************************************************

Project Details
Stamps : Pink Persimmon "Vintage Greetings" (banner), "Banner with Rosettes" (rosettes in center of flowers), and "Flower Garden" (butterfly) stamp sets.
Spray Ink - Glimmer Mist
Patterned Paper : My Mind's Eye and Bo-Bunny
Flower Punch : EK Success
Cuttlebug Embossing Folder
Trim orange cardstock 4.25" x 5.5" and adhere to card front.  Trim white cardstock slightly smaller, emboss and adhere to front of card.  Trim and tear green patterned paper and adhere along bottom of card.  Trim and tear green patterned paper and adhere along bottom of card.  Cut stems and leaves and doodle around edges with black pen.  Spray white paper with orange ink spray, stamp music rosette and trim.  Create pin wheels from patterned paper and adhere stamped rosette images, flower punches, and buttons as shown.  Adhere stems, leaves, adn pin wheels.  Stamp banner and sentiment on yellow cardstock, trim, highlight around the edges with Copic markers.  Stamp butterfly, trim, and adhere to card front.

********************************************************
Challenges
Let's Create -  pick an from older challenges "Let's Party"
Your Next Stamp - song "Happy Birthday to You"
4 Crafty Chicks - celebrate
Paper Play - handmade flower (mine are made out of Pin Wheels)
Raise the Bar - paper peicing

Thursday, August 25, 2011

More Birthday Wishes


Hello Paper Crafters.  Today I'm sharing a birthday card created using Pink Persimmon's "Vintage Cupcake".  Such a fun set.  If you missed my birthday ensemble using this set on sunday, then scroll down.  Hope you think this one is sweet!
Happy Tuesday!
Melisa
 
 
**********************************************
Project Details


Stamps : Pink Persimmon “Vintage Cupcake”
Markers : Copic E31, E26, YR30, R46
Patterned Paper : Jillibean Soup, Simple Stories
Cardstock : Bazzill
Butterfly Stick Pin : Jillibean Soup
Buttons : My Mind’s Eye
Border Punch and Deckled Scissors : Fiskars
Glitter : Stampendous
Glue : Aleene’s Tacky Glue

Make card from cardstock. Stamp cupcake on white cardstock and red polka dot paper. Color cupcake with markers. Trim liner and adhere to front of cupcake. Create icing with thick white glue and sprinkle with glitter. Stamp pennant on card front and color. After dry tape butterfly stick pin to back of cupcake. Adhere cupcake to card front. Border punch cardstock and adhere. Trim patterned paper strips and adhere to card front. Thread buttons with floss and adhere.

*******************************************
Challenges
Paper Sundaes (sun) -  green and buttons
Creative Inspiration Paints (sun) - clean and simple
Crafts 4 Eternity ( fri) - flags
The Pink Elephant (mon) - color challenge

********************************************

You can view all of my Pink Persimmon Projects HERE.

Sunday, August 21, 2011

Birthday Party Ensemble Tutorial


Hello Paper Crafters.  Today I'm sharing a birthday party ensemble that is deliciously sweet!  Designed using various Pink Persimmon stamp sets.  But the primary set is Vintage Cupcake.  This set comes with a yummy cupcake and lots of adorable cupcake toppers to choose from.  It also has a wonderful scalloped border.  You can stamp it as an outline and then color the scallops or stamp the inside with colored ink using the solid image.  And of course stamping it on patterned paper would be just as cute!
This ensemble includes a table top center piece, gift bag with tag, card, gift card holder, and a gift bags for the guest.  The table center piece is designed using paper mache boxes and an inexpensive paper party hat.  I am including a tutorial for this project and for a gift card holder.  Hope you enjoy it!


Begin by painting paper mache boxes with vintage white paint.  Trim patterned paper and adhere around top box with Mod Podge.  You have to work fast with this because it dry's fast.  Use as little as possible, because it can warp the paper.  With a foam brush, apply to back of paper and secure to box. 

 Adhere paper ribbon around edge of small box lid and striped ribbon around edge of larger box lid.  I used my Aleene's tacky glue for this.

Remove larger box lid.  Stamp cupcake in black ink around box.  Because the box is round, you have to roll the stamp from one side to the other.  Stamp the cupcake image on various coordinating pattern papers.  Cut the cupcake liners and cupcake icing's out separately.  And then adhere them over the cupcake images on the box.


At this point I figured out that I didn't leave enough space to add the toppers : ( .  So I had to substitute buttons.  So make sure when you create yours that you stamp those cupcakes closer to the bottom edge!  Create a bow with the striped ribbon and adhere to the front of smaller box.


I created a decorative party hat to top off my paper mache birthday cake.  I purchased a set of paper hats that were on sale for $1 and embellished one.  Open up the hat from the back and lay it out flat.  Apply Mod Podge and adhere it to the backside of some patterned paper.  Once dry, trim off excess paper around the edges.  Bring the 2 edges together at the back of the hat and adhere together with Aleene's Tachy Glue.  Adhere an extra large chenille stem around the bottom of the hat.  Adhere a large pom pom at the top of the hat.

Create a coordinating birthday card, gift tag for the gift bag, and gift card holder for the guest of honor.  And gift bags for your guest.


I added one of the cute toppers and the scalloped border from the "Vintage Cupcake" set to the card.  I stamp the "Dutch Journal Circle" on cream cardstock and green patterned paper for the background.  Trim the inside circle from the cream image and adhere it over the green one.  I created the  pink scalloped circle using my  Spellbinders Classic Scalloped Circles and the Grand Calibur.


These little gift bags are so easy to assemble and come in a variety of colors from Creative Cuts and More (Square Bag #01)  They are pre-cut and pre-scored.  Just fold and adhere!  The sentiment on this one is from the "Vintage Greetings" set.  I used my Spellbinders Standard Circles and Scalloped Circles with the Grand Calibur to create the background on the front of the bag.


I used the "Vintage Greetings" and "Ric Rac Circles" for the sentiments on the tag.


This little gift card holder is also easy to create using a Scor-Pal.  The sentiment is from the "Hello Vintage Girl" set.


Trim cardstock 4.5" x 7".  Score, from the left side, at 2 3/4", 3 1/2", and 4 1/4".  Fold at score lines. 


Use your gift card to draw penciled guidelines and cut. 


(this is not the actual card, but a prop to show you where to glue)

Flip it over and adhere along the edge as shown.  Do not apply too much glue or you want be able to slide your gift card in the slot you have created. 


Stamp and embellish outside of gift card holder and secure with ribbon.


***********************************************************
Supply List

Stamps : Pink Persimmon
Hobby Lobby : paper mache boxes, patterned paper, paper ribbon, striped ribbon, large chenille stems, Mod Podge, Aleene's Tachy Glue.
Michaels : large pom pom
Deckled Scissors : Fiskars

****************************************************
You can view more of my tutorials HERE
You can view more of my Pink Persimmon projects HERE
You can view all of my Altered Projects HERE
Related Posts Plugin for WordPress, Blogger...